Monday, October 18, 2010

Gingerbread Cookies


I have to be completely honest...I'm not sure how much more my heart can take. Every Saturday, I place my happiness in the hands of a bunch of 18 to 22-year-old boys and this year, they are letting me down week after week. Ugh! Sometimes being an Aggie is just rough.

So this year, I've chosen to focus on the fun off the field, rather than what happens on this field. It's just better that way. We have the best group of tailgating friends that we meet up with before home games. Our tailgate has grown from a group of people standing around in a campus park having a couple of beverages and snacks to tents, tables, grills, TV's & lots of food! (A big shout out to A&S for all they do to make our tailgate wonderful).

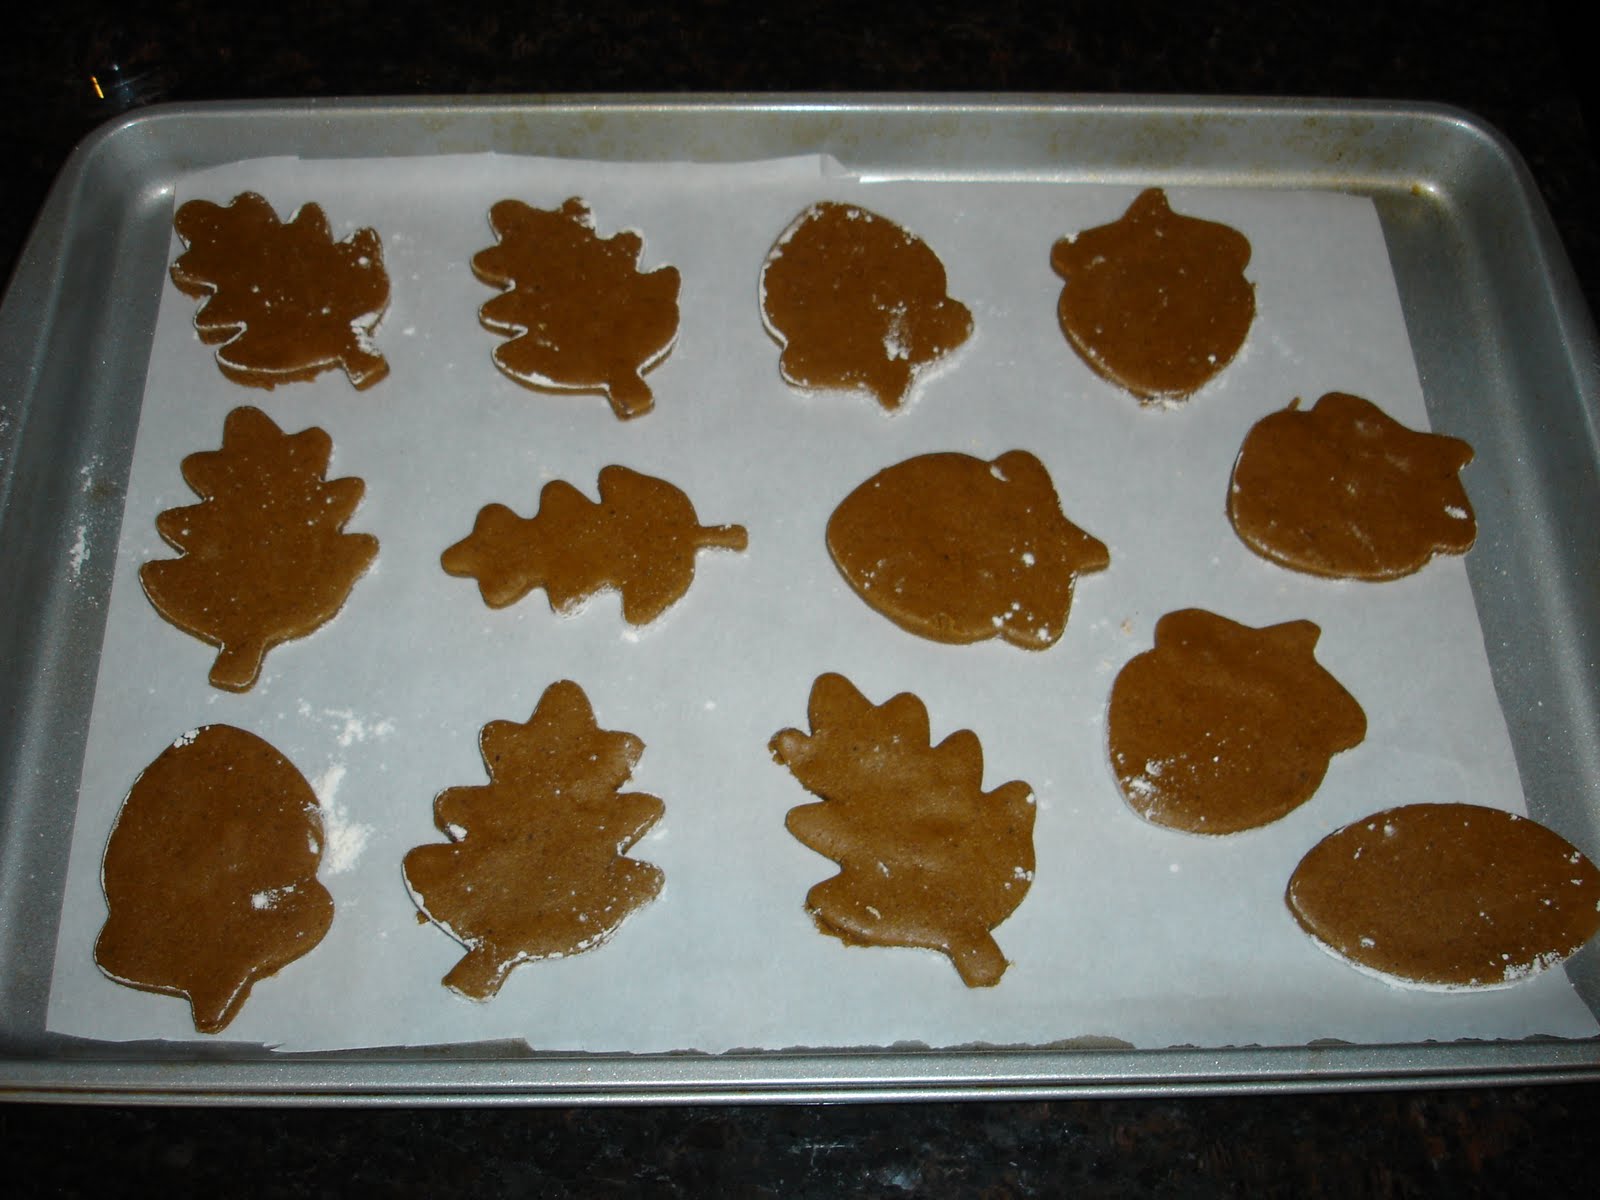
Before the season even started, I bought the cutest football themed cookies cutters in anticipation of make a tasty tailgate treat. Last week, I finally had the chance to use them. In sticking with my theme of "I-Love-All-Things-Fall", I made gingerbread cutout cookies!

A few years back I discovered Martha Stewart's Gingerbread Snowflake Cookie Recipe and it has changed my life. It is seriously easy to make. The dough is easy to work with and rolls out perfectly every time. The only problem I've found with these cookies is that I can't stop eating them.

Ingredients:

* 6 cups all-purpose flour, plus more for work surface
* 1 teaspoon baking soda
* 1/2 teaspoon baking powder
* 1 cup (2 sticks) unsalted butter
* 1 cup packed dark-brown sugar
* 4 teaspoons ground ginger
* 4 teaspoons ground cinnamon
* 1 1/2 teaspoons ground cloves
* 1 teaspoon finely ground pepper
* 1 1/2 teaspoons coarse salt
* 2 large eggs
* 1 cup unsulfured molasses
* Royal Icing (see below)


Directions:

1. Sift together flour, baking soda, and baking powder into a large bowl. Set aside.


2. Put butter and brown sugar in the bowl of an electric mixer fitted with the paddle attachment; mix on medium speed until fluffy.


Mix in spices and salt...


then eggs...


and molasses.


3. Reduce speed to low. Add flour mixture;


Mix until just combined.


Divide dough into thirds; wrap each in plastic. Refrigerate until cold, about 1 hour.


4. Preheat oven to 350 degrees. Roll out dough on a lightly floured work surface to a 1/4-inch thick.


Cut into shapes using your favorite cookie cutters.


Space 2 inches apart on baking sheets lined with parchment paper, and refrigerate until firm, about 15 minutes.


5. Bake cookies until crisp but not dark, 12 to 14 minutes. Let cool on sheets on wire racks.


6. Make Royal Icing (see below) and put icing in a pastry bag fitted with tip of your choice. Pipe designs on cookies; immediately sprinkle with sanding sugar. Let stand 5 minutes; tap off excess sugar. Let icing set completely at room temperature, about 1 hour. Store cookies between layers of parchment in an airtight container at room temperature up to 5 days.


And try not to eat them all in one day.


My Tid-Bits:

* Royal Icing: Beat two egg whites until stiff, but not dry. Add 1 box (about 4 cups) of powdered sugar & 1 tsp. almond extract. Beat for another minute of so. If the icing is too thick, add more egg white. If it's too thin, add more sugar.

* This recipe makes about 70 small to medium sized cookies.

* These cookies make great (and inexpensive) holiday gifts for friends & co-workers. I've done large snowflakes, gingerbread men, fall leaves, etc. Package them up in cellophane bags tied with a cute ribbon & gift tag.

* One important thing to remember when working with cutout cookies: Be sure to use plenty of flour on your work surface when rolling out the dough. Otherwise, it will stick and it will be very difficult to get the cookies from the counter to the baking sheet without deforming them.

Thursday, October 14, 2010

Slow-Cooker Turkey Chili

My Crock Pot has been getting quite a bit of use lately. After making Slow-Cooker Green Chili (aka Carne Guisada) over the weekend, I made a delicious Slow-Cooker Turkey Chili for dinner on Monday. I tore the recipe out of a Southern Living magazine last year, stuck it in a pile of other recipes and never looked at it again. That is, until last week when I started doing some digging for new cooking ideas.

Y'all know that I love meals that are fast, easy & tasty. This one fits the bill. I threw this together in about 15 to 20 minutes at lunch and let it cook all afternoon. By the time The Hubs got home from work, it was ready to eat. All I had to do was chop up a little cilantro.

Ingredients:

* 1 1/4 pounds lean ground turkey
* 1 large onion, chopped
* 1 garlic clove, minced
* 1 (1.25-oz.) envelope chili seasoning mix
* 1 (12-oz.) can beer
* 1 1/2 cups frozen corn kernels
* 1 red bell pepper, chopped
* 1 green bell pepper, chopped
* 1 (28-oz.) can crushed tomatoes
* 1 (15-oz.) can black beans, drained and rinsed
* 1 (8-oz.) can tomato sauce
* 3/4 teaspoon salt
* 1 (4-oz.) can diced green chilies (my addition)
* 2 tsp. chili powder (my addition)
* Toppings: shredded cheese, chopped red onion, sliced fresh jalapeƱos, cilantro


Directions:

1. Cook first 4 ingredients in a large skillet over medium-high heat, stirring often, 8 minutes or until turkey crumbles and is no longer pink.


2. Stir in beer, and cook 2 minutes, stirring occasionally. Spoon mixture into a 5 1/2-qt. slow cooker.


3. Stir in corn and next 6 ingredients until well blended.


(And if you'd like a little more flavor, add in the green chilies & extra chili powder).


Cover and cook on LOW 6 hours.

4. Serve with desired toppings.


My Tid-Bits:

* Behold the power of the internet! I love that magazines now put all of their recipes online so I can look them up & read the reviews. Many of the reviews said that this chili was good, but could use a little extra seasoning. So at the recommendation of several reviewers, I added some extra chili powder & green chilies. The chili is not spicy AT ALL, so if you like it hot, add some Louisiana style hot sauce.

* This recipes makes 6 very full bowls of chili. The good news: each bowl only has 300 calories and 4 grams of fat. The bad news: each bowl has a lot of sodium, most of which comes from the canned tomatoes & black beans. If you can find lower-sodium varieties, definitely use those instead.

* One big thing to consider: The flavor of your chili will be very dependent on the chili seasoning & beer that you choose to use. I used Chili-O because that's what I grew up eating. I would recommend you use your favorite, if you have one. I also used Fat Tire beer (again because its what I had in the refrigerator). I probably won't use it again, though. While it's great for drinking, I think a Mexican beer would be better suited for this chili.

* I used ground turkey, like the recipe called for, and it tasted great. The Hubs didn't even notice a difference. However, if you have an aversion to ground turkey, you can easily sub ground beef or even ground chicken.

Wednesday, October 13, 2010

Sauteed Spinach with Mushrooms

Over the weekend, The Hubs & I had planned to grill steaks for dinner. I had bought some corn on the cob serve as a side, but wanted something else to go with it. I dug around in the refrigerator & pulled out some baby spinach and sliced baby bella mushrooms. After browsing a few websites for inspiration, I grabbed a few other ingredients & made my first attempt at Sauteed Spinach with Mushrooms. Luckily, it turned out delicious!! Even The Hubs, who doesn't usually care for spinach, liked it!

Ingredients:

* 1 Tbsp. butter
* 1 tsp. EVOO
* 2 cloves garlic, chopped
* 5 green onions, green & white parts, thinly slicked
* 5 oz. sliced mushrooms
* 2 Tbsp. red wine
* 1/4 cup chicken broth
* Half of a 6 oz. bag of spinach
* salt & pepper


Directions:

1. In a large skillet, melt 1 Tbsp. butter with 1 tsp. EVOO. Add garlic & onions and saute 3-4 minutes.


2. Add the mushrooms & saute until they are soft & begin to release their liquid, 5-8 minutes.


3. Add red wine & chicken broth. Let simmer for 2-3 minutes.


4. Stir in the spinach and cook until wilted & heated through, another 2 minutes.


5. Serve while still hot.


My-Tid Bits:

* You can use whatever mushrooms you have on hand. I just like portabellos the best.

* This made enough for 2 people, but the recipe can easily be doubled.

* The mushrooms went especially well with the steak. I might make the mushrooms alone as a topping next time we have company over for steaks.

* And, yes, I did use red wine straight from my own glass. It was a Shiraz. Kilikanoon Killermans Run, to be exact. And its good!

Tuesday, October 12, 2010

Favorite Fall Finds


Over the past few weeks, I've found several fall treats & I feel they are worth sharing with you all. So here we go...my Favorite Fall Finds:

TCBY Pumpkin Spice Frozen Yogurt

photo: foodbeast.com
Umm...delicious! I love TCBY and their many (low-cal) flavors. Their Pumpkin Spice yogurt has just a hint of pumpkin and is SO good! And here's a tip: Sign up for their email club & they'll send you all sorts of good coupons. Last month was $1 off. This month was buy one, get one free! The Hubs didn't want any yogurt last night, so I got a free cup & stashed it in the freezer. That one was another DELICIOUS flavor....Orange Sorbet! You remember the Dreamcicles you got in the cafeteria in elementary school? It tastes Just. Like. That!


Starbucks Pumpkin Spice Steamer

photo: starbucks.com

I don't like coffee. I really wish I did because Carmel Macchiatos & Cinnamon Dolce Lattes sound & smell delicious. But I just don't like the taste of coffee. Lucky for me, my dear friend Jennifer introduced me to the Starbucks steamers. They're basically steamed milk blended with your favorite flavor. I typically order a tall-non-fat-vanilla-hazelnut-steamer-no-whip. However, when fall rolls around & the Pumpkin Spice Latte goes back on the menu, I can order my steamer with pumpkin. You should try it!


Pinto Pony Cookies

While on our get-away to the lake house last weekend, The Hubs & I made a day trip to San Augustine. It's a tiny little Texas town with one main street, lots of history, antique shops and a cookie factory called Pinto Pony. My mom & her friends had visited Pinto Pony once before, so on their recommendation, The Hubs & I stopped in. I'm SO glad we did! (My diet on the other hand...not so glad). We visited with the owners, who were so kind & informative. We got to sample all of the flavors and walked out with 3 bags of cookies: Oatmeal Blueberry, Oatmeal Cranberry & Oatmeal Chocolate Chip. Lucky for us, you can order them online from their website: www.pintopony.com. They will box them up in beautifully decorated boxes, making them great gifts, too!

photo: pintopony.com

If you ever happen to be driving through San Augustine, you should stop in and get a homemade ice cream sandwich. For now, we'll be content making our own until our 3 bags run out.


I have fall favorites that aren't food related, too...

Bath & Body Works Candles

There's just something about the smells of pumpkin & apple that I just can't get enough of. I happened to be in Bath & Body Works one day last month when they had their fall candles on sale. I bought 2 for me and several more for friends. My favorites are Pumpkin Patch & Caramel Apple. (Their winter scents just came out and I may or may not have already purchased two of those scents, as well).

Cute Fall Decorations


The colors of fall fit right in with the colors of my home, so I'm always eager to climb up in the attic & get out my fall decor on September 1st. (Even if it is still 102 degrees outside). I have a favorite little shop in Salado called Horsefeathers where the vast majority of my holiday decor has come from, including the two cute little guys above.

I could go on & on about my favorite things of Fall. I'm sure over the next couple of months, I'll share some more. For now, please feel free to share your Favorite Fall Finds! I need to know about the fabulous fall things I don't want to miss out on.

.

Monday, October 11, 2010

Slow-Cooker Green Chili (aka Carne Guisada)

Last Friday, The Hubs & I took the day off from work & headed to the lake house for a long weekend of rest & relaxation. And aside from the 4 very intense hours while watching our beloved Ags look sloppy while getting beat by Arkansas, we had a very relaxing 3 days.

Before we left, I had to put together a menu & make sure that I had all the food items necessary for our meals because, as I have said before, there is nowhere to buy groceries within 25 minutes of our house. So, I flipped through my latest magazines looking for easy recipes that could be thrown together without much effort.

I found a recipe from Martha Stewart's Everyday Food called "Slow-Cooker Green Chili." I thought the name sounded a bit odd, but I kept reading & found that it was basically a recipe for stewed meat, peppers, potatoes & carrots in broth. Ummm... in Texas we call that Carne Guisada. It looked easy & sounded tasty, so I purchased the necessary ingredients.

After lunch on Friday, I tossed everything in the Crock Pot & let it simmer all afternoon. It smelled amazing and tasted just as good! We had plenty for dinner that night & leftovers for lunch the next day.

Below is Martha's recipe. Below that are my changes, as always.

Ingredients:

* 2 Tbsp. vegetable oil
* 3 lbs. boneless pork shoulder, cut into 1.5-inch cubes
* salt & pepper
* 1 3/4 cup low-sodium chicken broth
* 1 medium yellow onion, diced medium
* 2 garlic cloves, chopped
* 1/2 tsp. ground cumin
* 5 carrots, cut into 1/2-inch pieces
* 3 poblano chiles, stemmed, seeded & cut into 1-inch pieces
* 1 1/2 lbs. small red potatoes
* fresh cilantro, chopped
* flour tortillas
* lime wedges


Directions:

1. In a large skillet, heat 1 Tbsp. oil over high heat. Season pork with salt & pepper. In three batches, cook pork until browned on all sides, about 15 minutes total (add up to 1 Tbsp oil as needed). Transfer pork to a 6-quart slow cooker.


2. Add broth to skillet, stirring and scraping up browned bits with a wooden spoon. Pour broth into slow cooker, then add the onion, garlic & cumin...


Add the carrots, chiles & potatoes.


3. Cover & cook on high until meat is fork-tender, 6 hours.

4. Skim excess fat from top of chili. Serve chili with cilantro, warmed flour tortillas & lime wedges.


My Tid-Bits:

* For the meat, I used "Pork for Carnitas" from HEB. That is literally how it was labeled. 3 lbs of it cost me a whopping $5.45. I trimmed off the excess fat as a cubed the meat.

* As you can tell, I also used baby carrots instead of whole ones. It was easier & I already had some in the refrigerator.

* I double the amount of cumin & used 1 heaping teaspoon.

* I bought larger red potatoes & cut them into pieces, but next time I'll just buy the small ones & keep them whole. The pieces fell apart too much.

* By the time the "chili" had stewed for 4.5 hours, the meat was already falling apart it was SO tender. Six hours would have been too much. Just keep an eye on it and when the meat falls apart easily, turn the Crock Pot down to the warm setting until you're ready to serve.

* We started off eating these like fajitas by wrapping the meat & veggies in a tortilla and topping with lime juice and cilantro. By the end of dinner we were eating straight out of the serving dish with a fork. Sometimes manners don't matter.

Thursday, October 7, 2010

Honey Marinated Pork Chops (or Chicken)

The Hubs loves pork chops. Me? Not so much. It's a texture thing. So I don't make them very often. And by not often, I mean never. (I also don't make two of his other favorites - meatloaf & fried chicken. If he wants them that badly, he can go visit his mother).

However, the October issue to Martha Stewart Everyday Food, featured a recipe for a honey marinade that sounded really good. Only one problem...Martha used the marinade to make grilled pork chops. Now, she did say you could use it on chicken instead, but I decided to be a big girl & try the pork chops. If nothing else, my husband would be happy.

So I tried it...

I ate half of my pork chop...

It was okay...

But next time I'm having chicken.

The marinade, however, was delicious!

Ingredients:

* 2 Tbsp. Dijon mustard
* 1/4 cup honey
* 1/4 cup red wine vinegar
* 1/4 cup extra-virgin olive oil
* ground pepper
* 2 or 3 pork chops (or chicken breasts)


Directions:

1. In a bowl, whisk together all ingredients.


2. Place the pork chops in a Ziploc bag and pour 1/2 of the marinade over them, reserving the other half for another use (see below).


3. Refrigerate for at least one hour (up to 3 hours) before grilling, baking or pan frying. (We grilled ours).


My Tid-Bits:

* The marinade can be used for other things as well. Martha suggests: Adding it to shredded cabbage to make a sweet-and-sour slaw; Tossing it with steamed cauliflower or broccoli; Marinating firm tofu and baking or grilling (I guess that would be good, if you like that kind of thing); OR using it as a salad dressing. That's what I did and it was tasty!


* The Hubs actually used some of the left over marinade as a sauce & poured it on his pork chop.

* If you do grill the pork chops, be sure not to over cook them. They dry out & get tough very easily. (Although, next time I'm sticking with chicken).

* When I made my grocery list, I forgot to check & see if I already had Red Wine Vinegar in the pantry, so I just grabbed a bottle at the store. Apparently that's not the first time I've done that....

Oops!!

.

Saturday, October 2, 2010

Buffalo Wings


In case you didn't know, college football (especially Aggie football) is kind of a big deal in our home. So, when the Ags played OSU on ESPN Thursday night, we thought it was a great excuse to have friends over. While we won't discuss the outcome of the game (it still hurts too much), we did have a good time visiting with friends while munching on some football food.

I don't know if there's a better football watching food than Buffalo Wings. The two just go together. (Although, I must confess that I hadn't EVER ordered Buffalo Wings until about a month ago. Now I'm hooked). However, the wings you get at most restaurants are fried & full of calories & fat. So, I set out to find a good recipe for baked Buffalo Wings and I hit the jackpot! Alton Brown (from the Food Network) had a recipe that had received over 200 reviews with an average rating of 5 stars. And the reviews were right! YUMMY!!

Below is the original recipe:

Ingredients

  • 12 whole chicken wings
  • 3 ounces unsalted butter
  • 1 small clove garlic, minced
  • 1/4 cup hot sauce (I used Frank's Red Hot)
  • 1/2 teaspoon kosher salt

Directions

1. Place a 6-quart saucepan with a steamer basket and 1-inch of water in the bottom, over high heat, cover and bring to a boil.

2. Remove the tips of the wings and discard or save for making stock. Using kitchen shears, or a knife, separate the wings at the joint. *(see below)

3. Place the wings into the steamer basket, cover, reduce the heat to medium and steam for 10 minutes.

4. Remove the wings from the basket and carefully pat dry.

5. Lay the wings out on a cooling rack set in a half sheet pan lined with paper towels and place in the refrigerator for 1 hour.

6. Preheat the oven to 425 degrees F.

7. Replace the paper towels with parchment paper.

8. Roast on the middle rack of the oven for 20 minutes. Turn the wings over and cook another 20 minutes or until meat is cooked through and the skin is golden brown.

9. While the chicken is roasting, melt the butter in a small bowl along with the garlic. Pour this along with hot sauce and salt into a bowl large enough to hold all of the chicken and stir to combine.

10. Remove the wings from the oven and transfer to the bowl and toss with the sauce.

11. Serve warm.

12. Don't forget the Ranch Dressing (or Blue Cheese, if you're into eating mold).


My Tid-Bits:

* I took the easy road & just bought wing portions & drumettes at HEB. That eliminated step 2 above.

* I knew that 24 wings portions wasn't going to feed 5 people. So I bought about 48 pieces and doubled the sauce. I also had to steam the wings in 2 batches.

* When I first read the recipe, I thought to myself, "why on earth do you steam the wings first." But all the reviews said not to skip this step, so I didn't. I'm still not exactly sure why you do this, but I'm pretty sure it has to go with making the meat super tender & the skin extra crispy. Don't ask questions....just steam the wings.

* I was AMAZED by the amount of fat that dripped off during the steaming & roasting process. I could just see the extra calories & fat melting away!!

* For the sauce, I used Frank's Red Hot Original (not the Buffalo) and it was perfect! They weren't super spicy, but still had great flavor.

* I couldn't resist making more Pumpkin Ale Bread this week. I served it, along with this yummy Caramel Apple Dip, for dessert. Someone came up with the idea of putting the dip on the bread. I wish they hadn't. It's dangerously tasty.