Showing posts with label Pasta. Show all posts

Tuesday, January 28, 2014

Mushroom Risotto

Houston witnessed a miracle today...it snowed!!  It only lasted a few minutes & (of course) it didn't stick, but it did fall from the sky, so we'll count it.  They even shut down all of the local schools and businesses.  These are the days that having a home office isn't as exciting.  I still had to work all day while most people enjoyed a "free" day.

On cold days like these, I crave something warm to eat. Mushroom Risotto fits the bill.  Risotto takes a while to make, but it's a labor of love.  Once you take your first bite, you'll realize it's worth all the time you stood at the stove, stirring...and stirring...and stirring. 


Mushroom Risotto

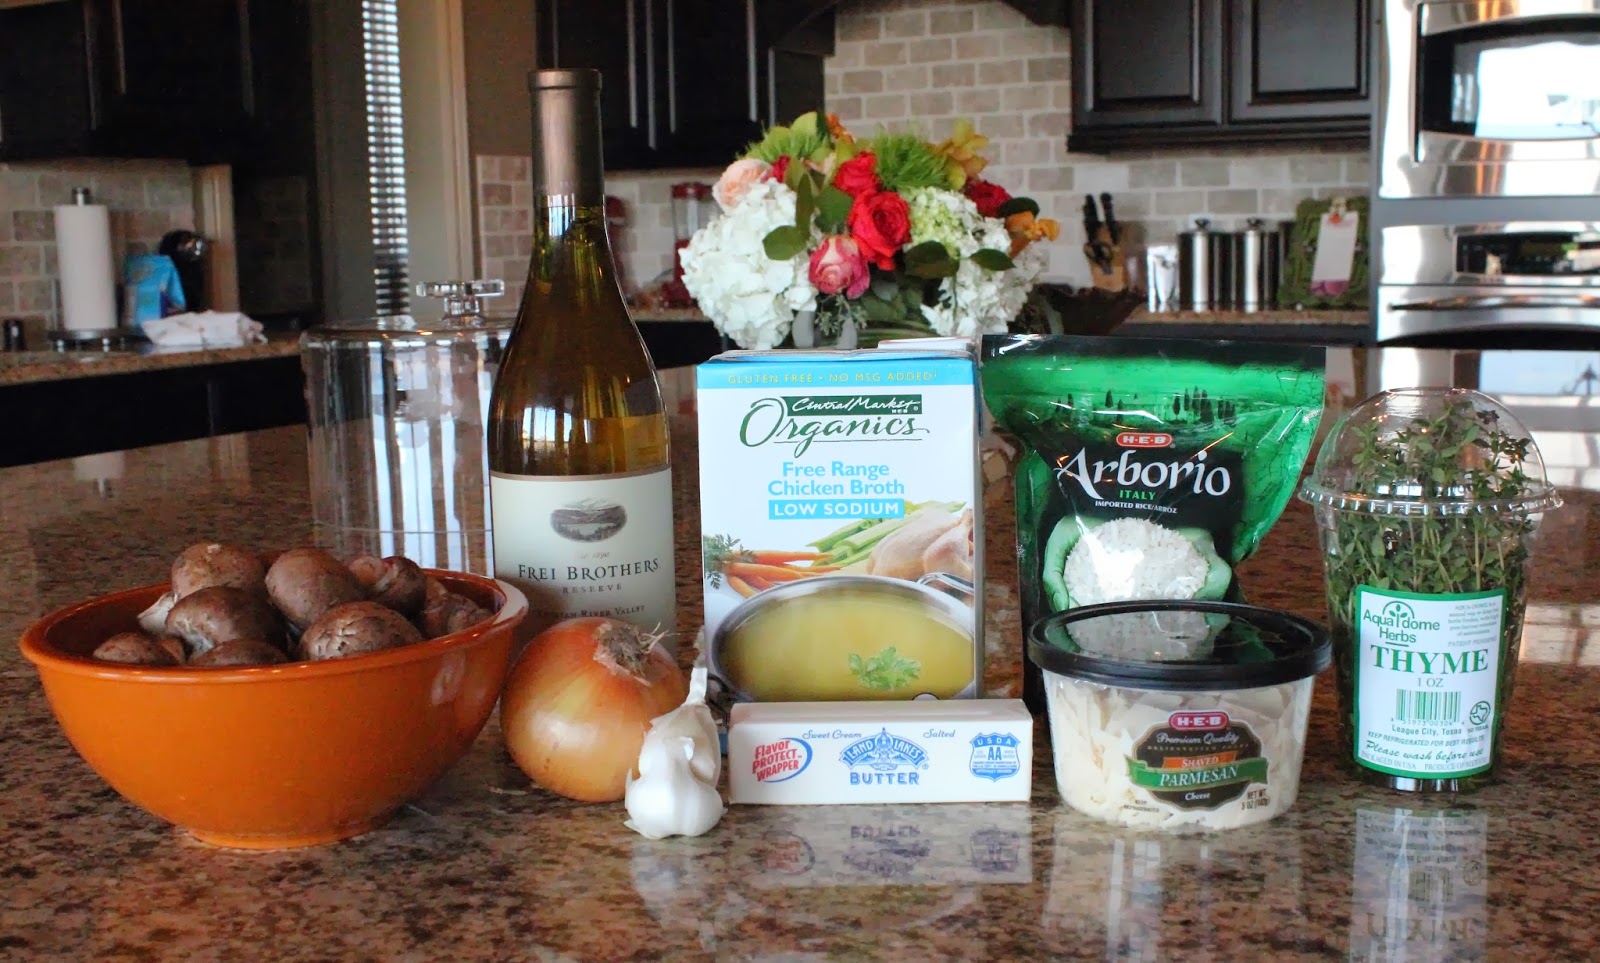
Ingredients:
  • 3 Tbsp. butter, divided 
  • 1 Tbsp. olive oil
  • 1 lb. mushrooms, sliced
  • 1 medium onion, chopped
  • 2 cloves garlic, finely chopped
  • 1 1/2 cups Arborio rice
  • 1/2 cup white wine
  • 5-6 cups chicken stock
  • 2 sprigs fresh thyme, leaves removed from stem & chopped
  • 1/2 cup parmesan cheese, shaved or shredded
  • kosher salt & pepper

Directions:

1.  Pour chicken stock into a 2 qt. saucepan and warm over low heat.  (Don't boil it, just keep it warm).

2.  In a large, heavy pot, heat 2 Tbsp. butter over medium heat.  Add mushrooms and saute until tender, about 5 minutes.  Transfer to a bowl and set aside.

3.  Add 1 Tbsp. butter & 1 Tbsp. olive oil the the pot.  Saute onion & garlic for 3-4 minutes.  Stir in the rice and cook for 2-3 minutes.

4.  Pour in white wine and bring to a simmer, stirring constantly. 

5.  Once the wine has been completely absorbed, add 1/2 cup of chicken stock.  Simmer, while stirring, until the liquid has been mostly absorbed.  Repeat with remaining chicken stock, adding 1/2 cup at a time, letting each addition absorb before you add the next 1/2 cup.  Stir frequently.  Depending on your rice, you'll use 5-6 cups of chicken stock.  When you're getting close to the end of your chicken stock, taste the rice for doneness.  It should be creamy & soft, but not mushy. 

6.  When you add the last 1/2 cup of stock, stir in the mushrooms, thyme & parmesan cheese.

7.  Season with salt & pepper.  (You'll want to taste it again at this point.  If you use reduced sodium chicken stock, you'll probably need to add a generous amount of salt.  Start with 1/2 tsp. and go from there).

8.  To serve, top with additional parmesan cheese.

My Tid-Bits:

* You can use whatever type of mushrooms you'd like.  I would normally use an assortment of wild mushrooms, but the wild mushrooms at my grocery store looked sad.  I went with baby bellas instead. 

*  Step 5 will take a good 25-30 minutes.  Be patient and enjoy a glass of wine while you stir. 

* I served this risotto with grilled steaks & roasted green beans.

Friday, July 22, 2011

Rustic Pasta with Grilled Chicken

Want another easy & quick summer recipe? Good, because I've got one.

It's no secret that I love basil. Basil & cilantro run neck & neck for the herb most used in our home. I use one or the other (or both) almost daily.

This Rustic Pasta with Grilled Chicken can be made in literally about 20 minutes from start to finish.

Ingredients
:

* 2 boneless, skinless chicken breasts
* Italian seasoning
* penne pasta (or whatever you have on hand)
* 3-4 medium tomatoes, diced
* 1 cup lightly packed basil leaves, chopped or torn
* 3 Tbsp EVOO
* 2 cloves garlic
* salt & pepper


Directions:

1. Season chicken breasts generously with Italian season. Grill over medium-high heat until cooked through.

2. Meanwhile, cook pasta according to package directions.

3. In a bowl, combine the chopped tomatoes, basil, EVOO & garlic. Season generously with salt & pepper.

4. Combine the cooked pasta with the tomato mixture.

5. Serve with sliced grilled chicken.


Ta-da! I told you it was easy.


Tuesday, February 15, 2011

Fresh Vegetable Lasagna

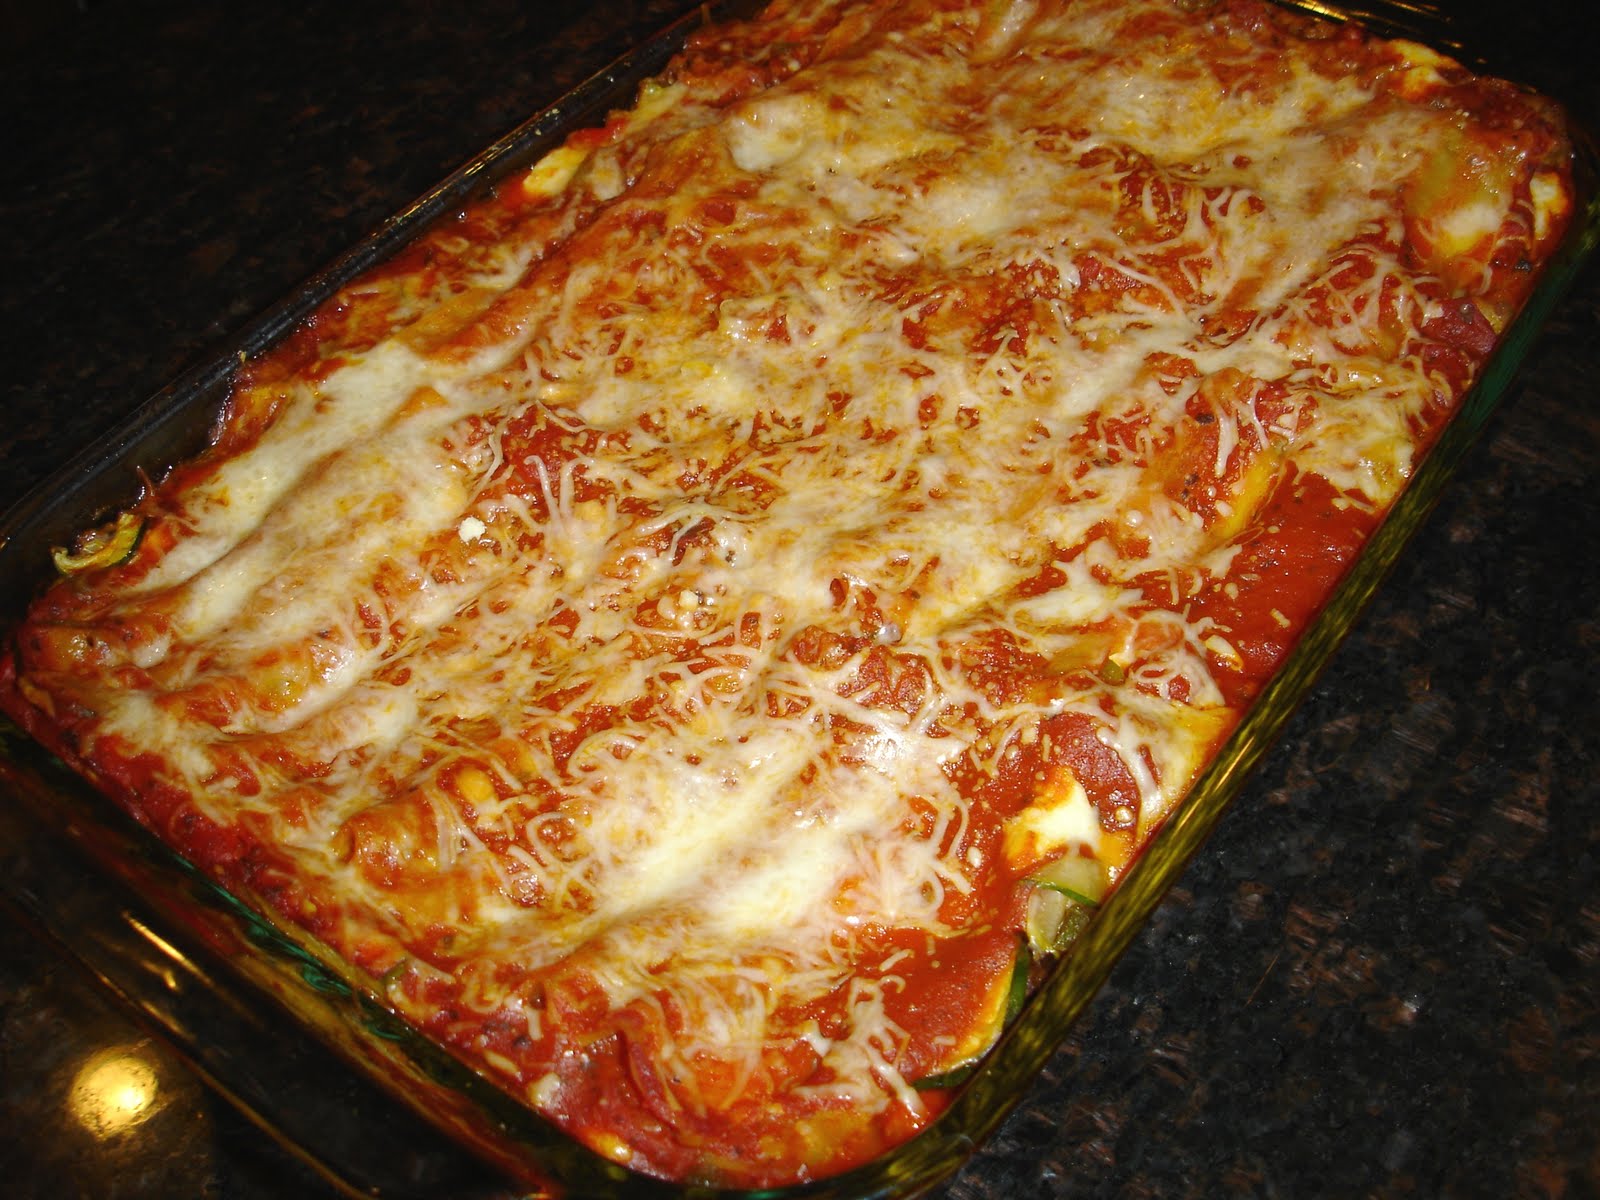
Southern Living often features a "Lighten Up" section in their magazines with healthier versions of our favorite dishes. The February edition had a recipe for Fresh Vegetable Lasagna made with zucchini, mushrooms & peppers, rather than meat. I made it last week & it turned out to be quite tasty!

Ingredients

  • 4 medium zucchini, halved lengthwise and thinly sliced (about 1 1/2 lb.)
  • 1 (8-oz.) package sliced fresh mushrooms
  • 2 garlic cloves, minced
  • Vegetable cooking spray
  • 1 medium-size red bell pepper, chopped
  • 1 medium-size yellow bell pepper, chopped
  • 1 yellow onion, chopped
  • 1/2 teaspoon salt
  • 1 1/2 cups fat-free ricotta cheese
  • 1 large egg
  • 2 cups (8 oz.) shredded part-skim mozzarella cheese, divided
  • 1/2 cup freshly grated Parmesan cheese, divided
  • 5 cups Basic Marinara Sauce (or just over 1.5 jars of sauce)
  • 1 (8-oz.) package no-boil lasagna noodles

Preparation

1. Preheat oven to 450°. Bake zucchini, mushrooms, and garlic in a jelly-roll pan coated with cooking spray 12 to 14 minutes or until vegetables are crisp-tender, stirring halfway through. Repeat procedure with bell peppers and onion. Toss together vegetables and salt in a bowl.

2. Reduce oven temperature to 350°.

3. Stir together ricotta, egg, 1 1/2 cups shredded mozzarella cheese, and 1/4 cup grated Parmesan cheese.

4. Spread 1 cup Basic Marinara Sauce in a 13- x 9-inch baking dish coated with cooking spray. Top with 3 noodles...

1 cup sauce & one-third of ricotta mixture...

and one-third of vegetable mixture.

5. Repeat layers twice, beginning with 3 noodles. Top with remaining noodles and 1 cup sauce.

6. Sprinkle with remaining 1/2 cup shredded mozzarella and 1/4 cup grated Parmesan.

7 . Bake, covered, at 350° for 45 minutes. Uncover and bake 10 to 15 more minutes or until cheese is melted and golden.

7. Let stand 10 minutes. Cut into 8 pieces & serve with warm garlic bread.


My Tid-Bits:

* If you follow their recipe & use their homemade Basic Marinara Sauce, this lasagna yields 8 hearty serving with 282 calories and less than 10 grams of fat each.

* I, however, did not have time to make marinara AND lasagna, so I just used the jarred version.

* I also used 1 red & 1 green bell pepper due to the fact that a yellow bell pepper cost 3x the green. You'll probably notice from my picture, I used 2 zucchini. I wish I had used 3. I think 4 may have been excessive.

* The Hubs comment was, "This was actually pretty good, but it would have been even better with meat." In his mind, it's not dinner if there's not meat. So if you have a manly meat eater in your home, feel free to brown some Italian turkey sausage and toss that in.

* I will warn you, making this lasagna is a bit time consuming. With all the chopping, roasting & assembly, the prep probably took me almost an hour. It then takes another hour to bake & 10 minutes to rest. So be sure you start plenty early if you plan to make this for dinner and want to eat at a decent time.

Monday, November 1, 2010

Soy-Ginger Fish & Veggies in a Pouch

Last week, I made this delicious dish (inspired by a similar dish from my Cooking Light cookbook) for The Hubs & I for dinner. It's super simple - the hardest part is chopping the vegetables - and relatively quick to make.

I used several different vegetables, including green onion, carrot, red bell pepper, mushrooms & green beans. Feel free to substitute your favorite veggies.
Ingredients:

* lime juice from 2 limes
*1/4 cups low-sodium soy sauce
* 1 Tbsp. fresh ginger, peeled & grated
* 1 jalapeno, seeds removed & finely diced
* 6 green onions (green & white parts), finely chopped
* carrots, shredded
* green beans (fresh or frozen)
* sliced mushrooms (I used baby bella)
* red bell pepper, thinly sliced
* 2 (6 oz) fish fillets (I used mahi mahi)
* 4 oz. spaghetti,
* chopped cilantro


Directions:

1. Preheat oven to 425 degrees and chop veggies accordingly.


2. Combine lime juice, soy sauce, ginger & jalapeno in a bowl large enough to dip fish fillets.


3. Lay 2 (16 inch) pieces of heavy duty aluminum foil on a work surface.

4. Layer vegetables in the center of the foil in this order: carrots, onions, green beans, mushrooms & bell pepper. You can use as much or as little of each as you like. (I piled on A LOT of everything).


5. Dip fish in soy/lime mixture...


and place on top of the vegetables. Then spoon remaining mixture over the fish & veggies.


6. Fold foil around fish & veggies, creating a sealed pouch. Place on rimmed baking sheet and cook for 15 minutes. While fish bake, cook spaghetti according to package directions.


7. Let pouches stand for 3 minutes. Carefully open pouches and serve fish & veggies over cooked spaghetti noodles. Top with cilantro.


My Tid-Bits:

* This was FULL of flavor and had a great mixture of textures (which I love).

* Next time, I'll substitute sugar snap peas for the green beans. I just think they'd be better.

* Be VERY careful when opening the pouches. Steam will pour out & burn your little fingers!

P.S. Tonight I'm making The Pioneer Woman's Roasted Vegetable Minestrone to enjoy while we watch the Texans on Monday Night Football and wait for the cooler weather to arrive. I'll let you know how it goes.

Monday, October 25, 2010

Stuffed Baked Shells


Last week, I had a craving for pasta. I dug through a few cookbooks & magazines and finally decided to get creative and throw together my own (simple) version of Stuffed Baked Shells. I'll be honest, I've never made any type of baked pasta before - not even a lasagna. For my first attempt, I'd say it turned out pretty darn good!

Ingredients:

* 1.5 or 2 links Turkey Italian Sausage, casings removed
* 3 cups fresh baby spinach
* 1 (15 oz.) container low-fat ricotta cheese
* 1/3 cup grated parmesan cheese
* 1/2 cup low-fat shredded mozzarella cheese (plus more for sprinkling)
* 1 egg yolk
* 1 tsp. dried basil
* 1/2 tsp. black pepper
* 20 jumbo pasta shells
* 3 cups pasta sauce


Directions:

1. Preheat oven to 350 degrees. Cook pasta shells according to directions on the package, boiling 2 minutes less than suggested. Drain & set aside until cool enough to handle.

2. Brown sausage (casings removed) in a skillet until cooked through. Drain any excess grease & stir in spinach until wilted. Set aside to cool.


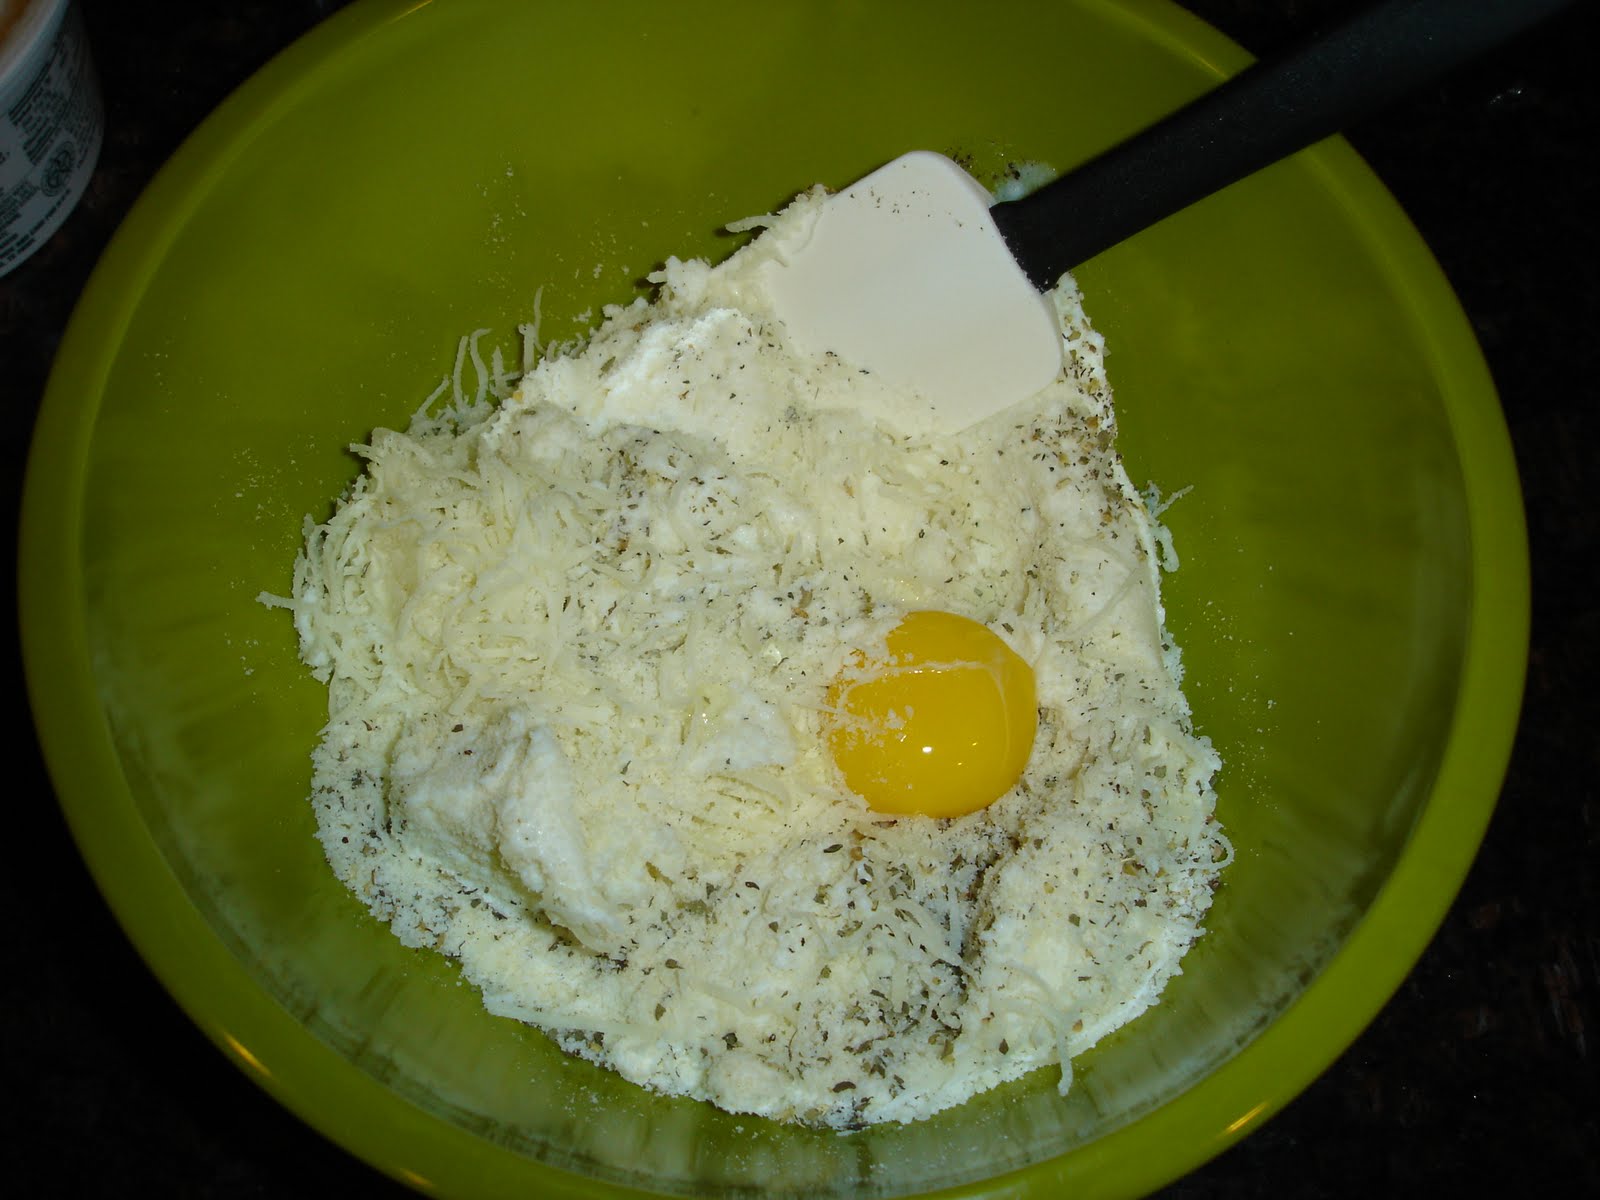
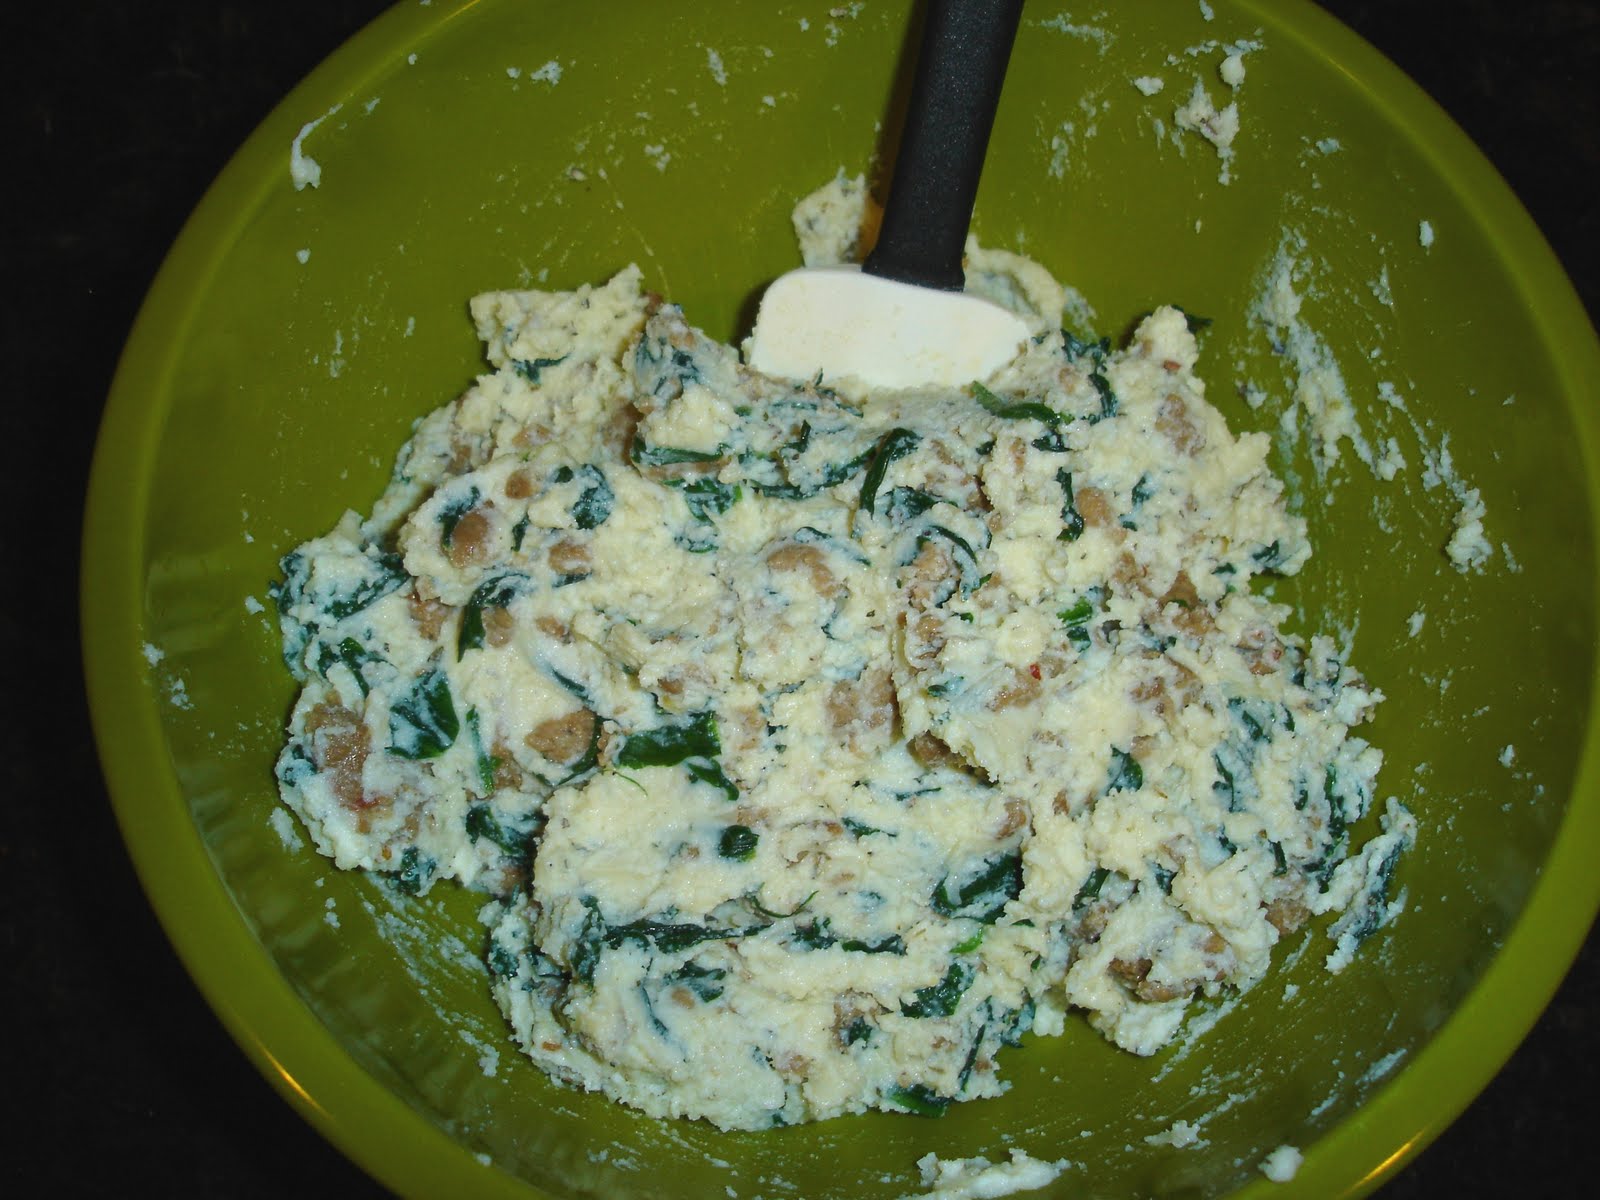
3. In a separate bowl, combine the cheeses, egg yolk, basil & pepper.


4. Next, fold the sausage/spinach mixture into the cheese filling.


5. Pour 3/4 cup pasta sauce into a slightly greased baking dish and spread to cover the bottom.


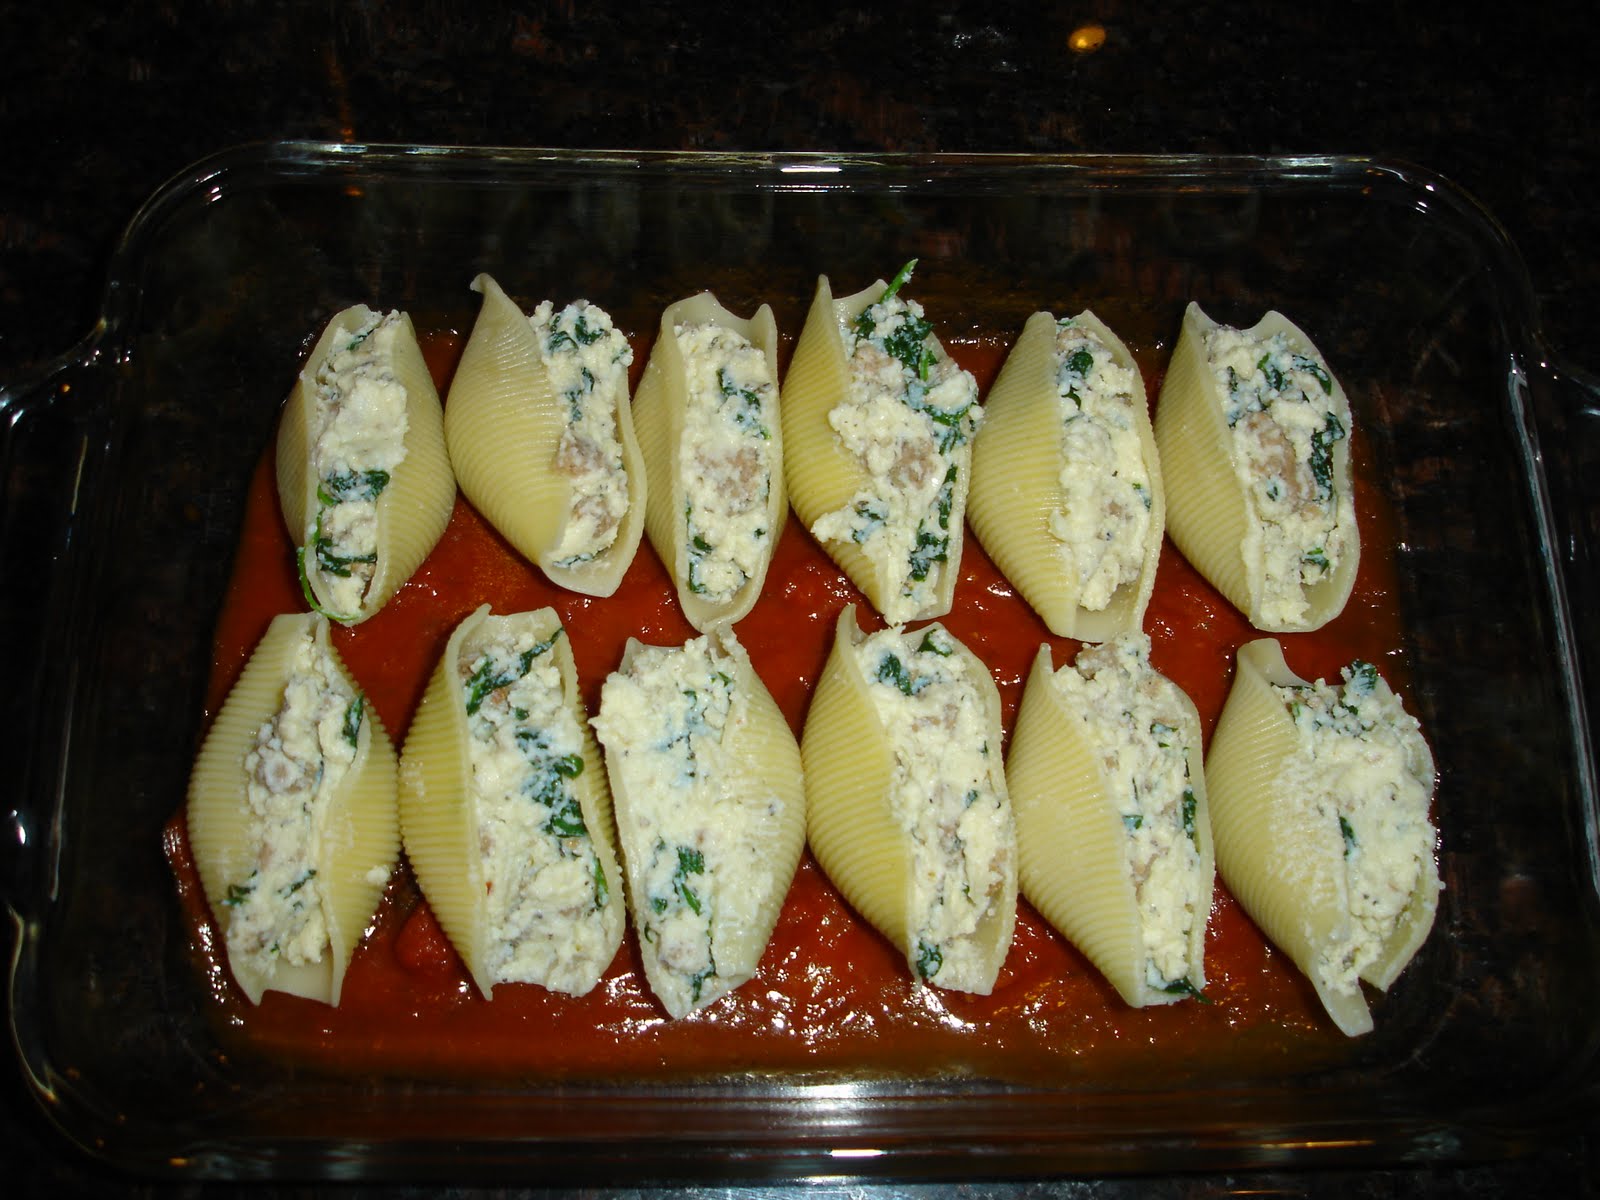
6. Spoon filling into cooked shells (approx. 2 Tbsp each)


And arrange in the baking dish.


7. Pour remaining pasta sauce over the top of the shells.


8. Bake for 25 minutes, sprinkling a bit of mozzarella over the shells during the last 5 minutes of cooking.


My Tid-Bits:

* There are several substitutes you can make for the filling. If you don't like Italian sausage, use plain old ground beef or turkey instead. You can also use frozen spinach in place of the fresh, just be sure to defrost & squeeze as much moisture out of it before combining it with the rest of the filling.

* This recipe made enough for me to fill 20 pasta shells. However, there was NO WAY that The Hubs & I were going to eat that many, so I baked some & froze some. I put the portion I wanted to freeze in a disposable aluminum baking dish. Next time we want to enjoy some stuffed shells, I'll simply let them defrost in the refrigerator over night & bake as usual.


* Since this freezes well, it's also a great meal for taking to someone who may be sick or perhaps is a new mom with her hands full!

* Lastly, if we call 3 shells a serving (which was plenty for me), each serving has less than 400 calories. For a pasta stuffed with cheese, that's not too bad.

.

Wednesday, September 8, 2010

Korean-Style Chicken Noodle Bowl


Last night, I made Rachel Ray's Korean-Style Chicken Noodle Bowl for dinner. It was delicious!!

Ingredients:

* Salt and pepper
* 1/2 pound spaghetti or angel hair pasta
* One 1-inch piece fresh ginger, grated
* 2 large cloves garlic, grated
* 1/4 cup tamari (dark soy sauce)
* 3 tablespoons honey or agave syrup
* 2 tablespoons tomato paste
* 2 tablespoons rice wine vinegar
* 1 tablespoon sesame oil
* 1 teaspoon hot sauce, such as sriracha, plus more to pass around the table
* 2 tablespoons vegetable oil
* 2 large skinless, boneless chicken breasts, cut into thin strips
* 1/4 small cabbage, very thinly shredded
* 1 red bell pepper, thinly sliced or chopped
* 1 medium zucchini, quartered & thinly sliced.
* 1 bunch green onions, thinly sliced on the diagonal
* Toasted sesame seeds, for garnish (optional)


Directions:

1. Start by cutting chicken into thin strips and then cutting each piece again into thin strips (like we did for the Thai Basil Chicken).


2. Using a blender or food processor, combine a splash of hot water, the ginger, garlic, tamari, honey (or agave), tomato paste, vinegar, sesame oil and hot sauce until smooth.


3. Bring a large pot of water to a boil, salt it, add the pasta and cook until al dente. Drain.

4. Get all of the remaining ingredients ready for a quick stir-fry. In a large skillet, heat the vegetable oil over high heat. Add the chicken and stirfry until browned, about 3 minutes. Remove chicken from pan onto a plate & set aside.


5. Add the cabbage, zucchini and bell pepper and stir-fry for 2 minutes.


6. Then add the chicken back in and stir-fry another minute or two.


7. Next, add the green onions and ginger sauce...


And toss for 1 minute.


8. Finish by serving over the drained noodles and top with the sesame seeds. Pass more hot sauce around the table.


My Tid-Bits:

* Per Rachel Ray's suggestions, you can also use thin cut pork chops or boneless skinless chicken thighs.

* My HEB didn't have Tamari, so I just used regular soy sauce & it was still delicious.

* I added in the zucchini because several reviews on the RR website said that the dish could use more veggies. The zucchini worked out perfectly!

* This was in the 30 minute section of the magazine, but with all the chopping involved, I don't see how anyone can do this in 30 minutes. From start to finish, it took me about an hour. If you prep (chop & make sauce) ahead, it cooks up in about 10 minutes.

.

Friday, August 20, 2010

Grilled Chicken & Vegetable Tortellini


This is a Southern Living recipe that combines 2 things I love: Pesto & Tortellini.

I modified the original recipe to be smaller and a little more healthy (the original would have been enough to feed 6-8 people).

Note: In the pictures you'll see I used mushrooms. Don't do that. I had some in the refrigerator that needed to be used up so I tossed them in. Not so good.


Ingredients:
  • 1 medium zucchini, sliced
  • 1 boneless, skinless chicken breast
  • 2 tablespoons Light Italian dressing
  • 1 tablespoon freshly ground Italian herb seasoning
  • 2 teaspoons EVOO
  • 1/2 (19-oz.) package frozen cheese-filled tortellini
  • 1/2 (7-oz.) container refrigerated reduced-fat pesto
  • 2 medium tomatoes, seeded and chopped
  • Garnish: grated Parmesan cheese

Directions:

Preheat grill to medium heat.

1. Marinate chicken breast in a Ziploc bag with Italian dressing for at least 30 minutes. Remove & season with 1/2 Tbsp. Italian seasoning.

2. Toss zucchini with EVOO and season with 1/2 Tbsp. Italian Seasoning. Place in grill basket or thread onto skewers.

3. Grill zucchini and chicken at the same time, covered with grill lid. Grill zucchini 7 -10 minutes, stirring (or flipping) once. Grill chicken 5 to 6 minutes on each side or until done. Remove from grill; let stand 5 minutes.

4. Meanwhile, prepare half a package of tortellini according to package directions.

5. Coarsely chop chicken. Toss tortellini with half a container of pesto, tomatoes, chicken, and zucchini.

6. Garnish, if desired and serve immediately.


My Tid-Bits:

* Per Southern Living's recommendation, I used the McCormick Italian Herb Seasoning Grinder. Excellent choice! It can be found in the spice aisle with the salt & pepper grinders.

* You may notice I show two chicken breasts in the photo. I grilled both and used one for this meal and the other for fajitas the next night. I shredded the second chicken breast, tossed it in a pan with some bell peppers, onions & a splash of chicken broth and let it all cook down for my fajita filling. Delicious & easy.

* If you make the recipe as it is above, you'll have enough for 3 or 4 servings depending on what you serve on the side & how much your family eats.

* And here's the most surprising part (at least for me)...when I typed this recipe into my handy little nutritional calculator, it turns out that each serving (if this is a 3 serving recipe) has only 385 calories. It's a little high on the fat side with 20g, but that's what makes it tasty.

.