Showing posts with label Treats. Show all posts

Tuesday, January 21, 2014

Bailey's Buttercream Icing

I'm not big on New Year's resolutions because no one ever keeps them.  However, for 2014, I decided that each month I'm going to challenge myself to one thing that betters my health, fitness or eating habits.  My hope is that committing to something for a full month will create new & better habits.

I started off the year with a big one. I gave up French fries for the month of January.  Yes, you read that correctly.  I, Nancy, gave up French fries.  That may not seem like a big deal to some of you, but those who know me well would tell you this is huge!  I LOVE FRENCH FRIES!  And as embarrassing as it is to admit, I was probably eating them 3+ times a week.  I went cold turkey at the beginning of the month & thus far, I haven't eaten a single French fry.  Not even when The Hubs ordered a big basket of them at lunch last week.  Not even when we went to dinner with friends and the waitress handed me a plate with fries nestled next to my sandwich even though I asked for a substitution.  Needless to say, I'm pretty proud of myself.

However...what I've saved in calories & fat grams from French fries, I've made up in this tasty, delicious Bailey's Buttercream Icing.  I've made it twice in the last 4 weeks.  I might be addicted.  It's so easy to make and goes perfectly with simple chocolate cake.

If you're in need of an easy & yummy dessert, I highly recommend this one.


BAILEY'S BUTTERCREAM ICING


Ingredients:
  • 1 cup (2 sticks) butter, softened
  • 4 cups powdered sugar
  • 6 Tbsp Bailey's (or other Irish Cream Liqueur)
  • 2 Tbsp heavy whipping cream
Directions:

In a large mixing bowl, beat butter until fluffy.   Slowly add powdered sugar 1 cup at a time until combined.  Pour in the Bailey's and beat slowly until combined.  Increase the speed to high & beat for 1 minute.  Add whipping cream and beat again for 1-2 minutes until light & fluffy.  If the icing is too thin, add a little more powdered sugar.  If it is too stiff, add a splash of Bailey's.

Spread icing onto a prepared chocolate cake or pipe onto cupcakes (or just eat it straight out of the bowl). 

My Tid-Bits:

* I've also made this same recipe using Kahlua.  It's delicious, as well.

* I have a confession.  When I make a plain chocolate cake, I use a box mix.  Why reinvent the wheel, right?

(I almost didn't buy this brand because it has the "M" word on the front.  Worst. Word. Ever).

* I'm not great at icing cakes.  I can never get the icing to smooth out just right.  My solution?  Cover up the imperfections with toppings (like sliced, toasted almonds) or pipe frosting along the edges. 

* If you're looking for me on February 1st, I'll be a Chick-fil-A stuffing my face with waffle fries. 

Tuesday, October 11, 2011

Hello Dolly Bars

Once again, it's been forever since I last shared a new recipe.  I have tons of photos sitting on my computer waiting to be uploaded & shared.  One of these days I'll get to them all.

For our tailgate, I'm officially the "dessert girl" - obviously meaning that I'm responsible for bringing some type of sweet treat to share with everyone each week.  A few weeks ago, after a crazy week at work, I needed something fast & simple to whip up.  I turned to my new addiction - Pinterest.  I found several different recipes for Hello Dolly Bars (also known as 7 layer bars).  Most of the recipes were the same - more or less.  So, I took the necessary ingredients and went to work.  The result was oh-so-tasty!!  

Next time you need a delicious, but quick dessert, give these a try.


Ingredients:

*  2 cups graham cracker crumbs
*  1 stick butter
*  1 cup chopped pecans
*  1 1/2 cups chocolate chips
*  1 cup butterscotch chips
*  1 cup sweetened, shredded coconut
*  2/3 can sweetened condensed milk


Directions:

1.  Place graham cracker crumbs in a zip-top baggie.  Melt butter and pour over crumbs.


 Close the bag and shake/massage the bag to combine the butter & graham cracker crumbs.


2.  Press the crumb mixture into the bottom on a 11x7 baking dish.


3.  Next, sprinkle the pecans, chocolate & butterscotch chips over the crust.


4.  Spread coconut evenly over the top.


5.  Last, drizzle 2/3 of a can of sweetened condensed milk over the entire thing.


6.  Place in a 350 degree oven and bake for 25 to 30 minutes, until golden brown.


 7.  Cool and cut into small squares (these babies are RICH).


Monday, August 15, 2011

Peach Crisp


Lately, every trip to the grocery store has found peaches in my shopping cart.  I'm trying to make the most of them while they're still in season and affordable.  (On sale for $0.87/lb at HEB this week for all you Texans that live south of DFW).

Last weekend, two of my three college roommates came to Houston for a girls weekend.  (The third currently live in Italia and couldn't make the trip, so Skype had to suffice.  We missed you, Court!).  

Everyone knows that no girls weekend is complete without lots of food to munch on while catching up on life, gossip, reality TV and old memories.  So before my friends arrived, I ran to the store to stock up on snacks and stuff to make a delicious dessert....Peach Crisp!  

This treat, which is very similar to the apple crisp I make every fall, has a sweet peach filling and oat crumble topping.  It's pretty much irresistible.  (The Hubs may or may not have dug into it before the girls arrived).

Ingredients:

  *  1 Pre-made, frozen pie crust
  *  6 large peaches, peeled & cut into very thin slices
  *  1/4 cup + 1/2 cup brown sugar
  *  2 Tbsp + 1/2 cup flour
  *  1/2 cup old-fashioned rolled oats
  *  1/4 cup of butter (half a stick), cut into small pieces


Directions:

1. Preheat oven to 350 degrees. To make the filling, place sliced peaches in a mixing bowl and toss with 1/4 cup of brown sugar.


2.  Add 2 Tbsp. flour to the mixture and stir to combine.


3.  To make the topping, mix 1/2 cup brown sugar, 1/2 cup flour & 1/2 cup oats in a bowl.  Add in pieces of butter.


4.  Using two forks or a pastry blender, cut butter into sugar/flour/oat mixture until crumbly.


5.  Pour peach filling into the frozen pie crust.


Try not to eat the filling out of the pie.


6.  Spread crumble topping evenly over the peaches.


7.  Place pie on a baking sheet.  Bake at 350 degrees for 1 hour, or until top is browned and filling is bubbly.


6.  Let cool on a wire rack until ready to serve.  Serve alongside a generous scoop of vanilla ice cream.


Wednesday, May 4, 2011

Peach Melba Shortbread Bars

If you're in need of a SUPER easy, but yummy dessert, these Peach Melba Shortbread Bars from Southern Living will not disappoint.

My only piece of advice: don't make them unless you have people to share them with. I could have eaten the entire pan.

Ingredients:
  • 2 cups all-purpose flour
  • 1/2 cup granulated sugar
  • 1/4 teaspoon salt
  • 1 cup cold butter
  • 1 cup peach preserves
  • 6 teaspoons raspberry preserves
  • 1/2 cup sliced almonds
  • Garnish: powdered sugar

Directions:

1. Preheat oven to 350°. Combine first 3 ingredients in a medium bowl.


2. Cut in butter with a pastry blender until crumbly.


Reserve 1 cup flour mixture.


3. Lightly grease an 11- x 7-inch or 9-inch square pan. Press remaining flour mixture onto bottom of prepared pan.


4. Bake at 350° for 25 to 30 minutes or until lightly browned.


5. Spread peach preserves over crust in pan.


6. Dollop raspberry preserves by 1/2 teaspoonfuls over peach preserves.


7. Sprinkle reserved 1 cup flour mixture over preserves. Sprinkle with almonds.


8. Bake at 350° for 35 to 40 minutes or until golden brown. Let cool 1 hour on a wire rack.


9. Cut into bars. Garnish, if desired. Serve or store in an airtight container using wax paper to separate each layer.


My Tid-Bits:

* As with most shortbreads, these were even better the 2nd & 3rd day!

* I didn't really measure the peach & raspberry preserves. I just eyeballed it and added some extra raspberry because its my favorite.

* If you don't have a pastry blender, don't be dismayed. A pastry blender isn't really necessary to make these. Just use two butter knives or a fork to cut in the butter.

Enjoy!!

Monday, April 25, 2011

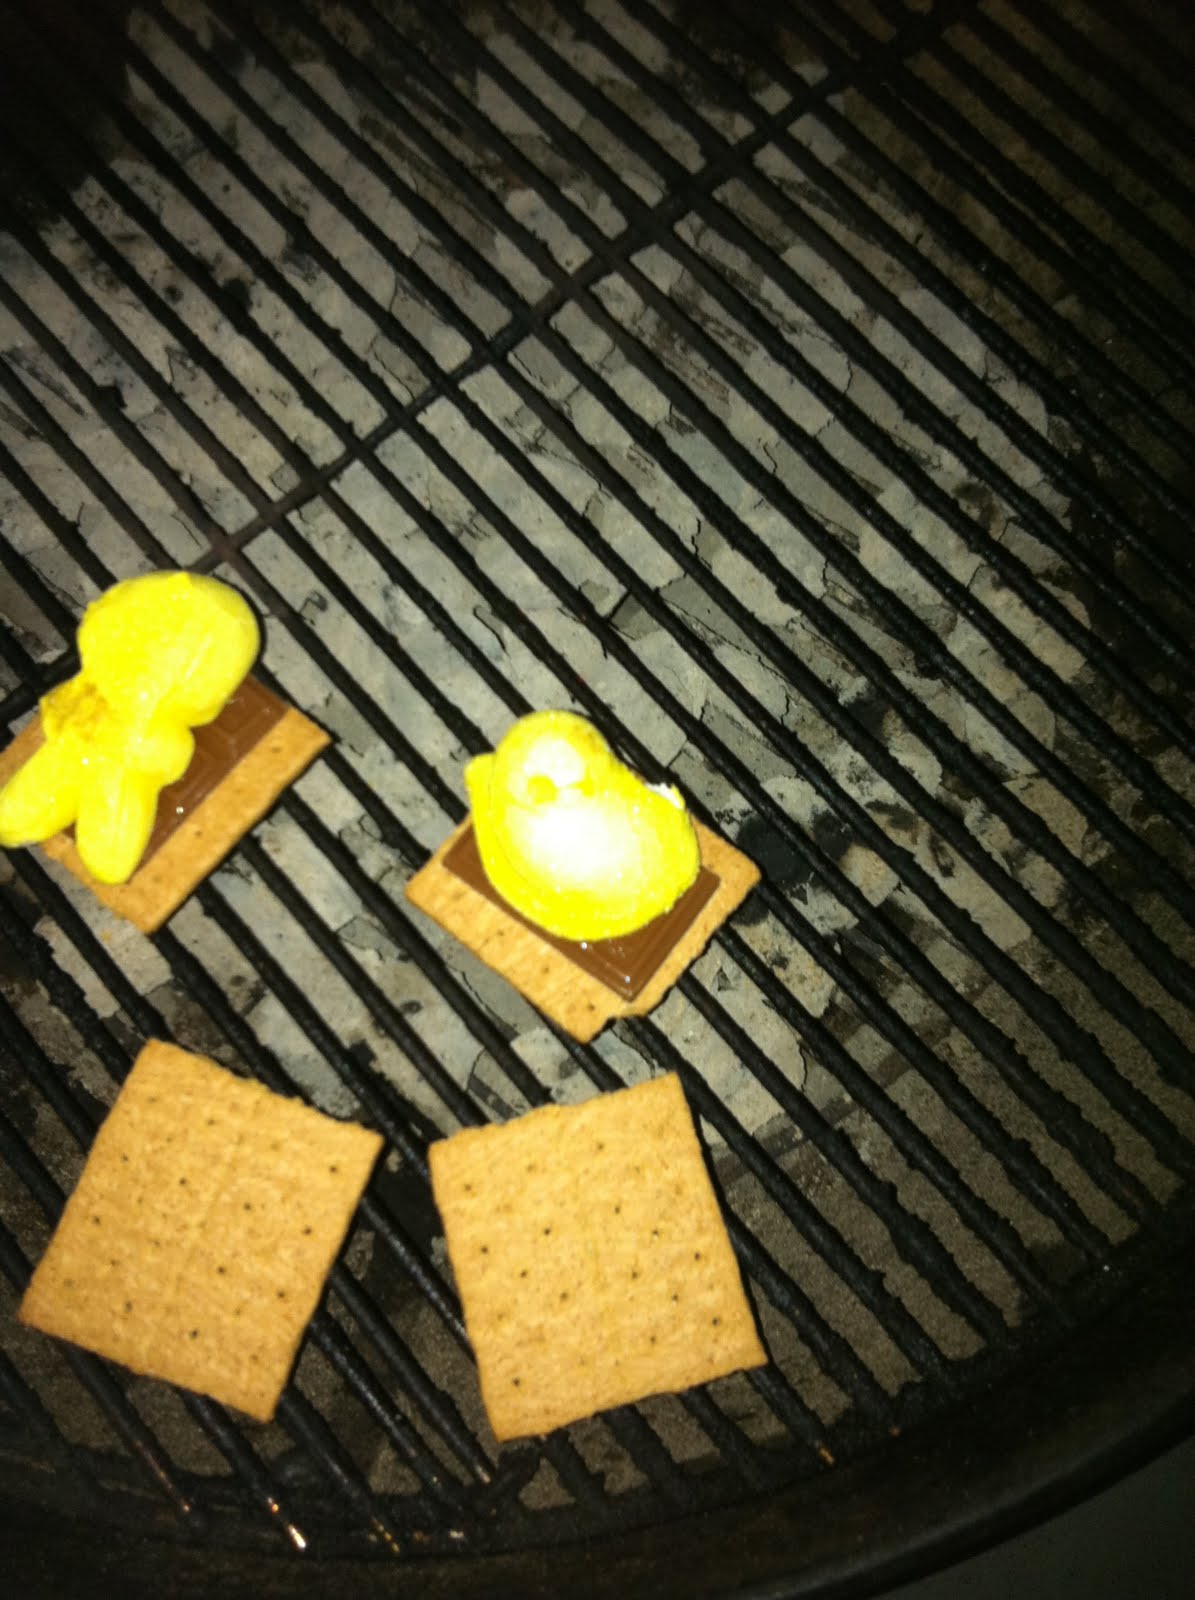
Got Leftover Peeps? Make S'Mores!

If your mom is like mine, every Easter your basket contains Peeps in some way, shape or form. In our home, it's just not Easter without Peeps. We love them! (And by we, I mean me. The Hubs thinks they're gross. I personally don't understand some people's aversion to Peeps - they're sugar coated marshmallows in the shape of animals. What's not to like?)

This year we spent Easter with our besties C&B at our lake house. As I was at HEB shopping for groceries for our weekend feasts (which included a crawfish boil & Easter brunch), I knew Easter just wouldn't be the same if I didn't bring along the Peeps. Also on my shopping list were the items needed to make another lake house favorite...s'mores. It was on the candy aisle that I got the bright idea to use the Peeps in place of marshmallows. (For a moment I wondered if causing the bunnies & chicks to bloat by heating them over a fire before eating them was a bit morbid, but then I decided...nah, it will just be tasty)!

So, if you have any leftover Peeps - turn them into s'mores!!

Ingredients:

* Graham Crackers
* Chocolate Bars
* Peeps!

Directions:

I do have to note that our lake house area, like most of Texas, is under a strict burn ban due to the dryness & high winds. Therefore, we had to make grilled s'mores rather than the traditional roast-your-marshmallow-on-a-stick-over-a-fire kind.

1. Start by placing 1/4 of a regular sized chocolate bar on 1/2 a sheet of graham cracker. Top it with a Peep.


2. Very carefully place the Peep topped cracker on the grill over indirect heat. Place another 1/2 of a graham cracker on the grill to heat & use as the topper later.

3. Cover & wait until the chocolate is melted & the Peeps are nice & fluffy. Remove from the grill with a spatula & place on a plate. CAUTION: The graham crackers will be HOT!


4. Top Peep with the 2nd graham cracker half, squishing the Peep and sending the chocolate oozing out the sides.


5. Enjoy!! The messier, the better!

Friday, March 4, 2011

National Pound Cake Day

Happy National Pound Cake Day!!

Until today, I didn't know that such a day existed, but I'll happily celebrate it! I love pound cake. Over the years, I've made MANY different versions of pound cake: raspberry, cream cheese, chocolate, etc. But one of my favorites has got to be peach. My mom shared this recipe with me and it is WONDERFUL!

Ingredients:

1 c. softened butter or margarine

3 c. sugar

6 eggs

3 c. flour

1/2 t. basking soda

3/4 t. salt

1/2 c. sour cream

2 c. peaches (fresh or frozen), peeled & chopped fine

2 t. vanilla

2 t. almond extract

1/4 to 1/3 c. Peach Schnapps + extra to brush warm cake

Directions:

1. Preheat oven to 325. Grease & flour one medium loaf pan and a bundt pan.

2. Pour Peach Schnapps over chopped peaches & set aside while you prepare batter.

3. Cream butter & sugar until light.

4. Beat in eggs one at a time.

5. Stir in flavorings, salt, & soda.

6. Add flour, alternating with sour cream and peaches.

7. Pour batter into prepared pans & bake until cake tests done. Loaf should take 30 to 40 minutes, the bundt cake an extra 15 to 20. Cool in the pan 10 minutes. Turn onto serving plate & brush with more Peach Schnapps while still warm.


Freezes well.

If desired, glaze with a mixture of powdered sugar & Peach Schnapps before serving – about 1 1/2 c. powdered sugar & enough Schnapps to make desired consistency.

Now I'm off to the College Classic at Minute Maid Park to watch some Aggie Baseball! Whoop!

Friday, February 25, 2011

Dulce de Leche

When we were at my sister's house a couple weekends ago, she pulled out this jar containing what looked like caramel sauce. One taste told me that this was even better than caramel sauce...it was Dulce de Leche. Oh. My. Heavens. SO YUMMY!

Of course I asked for the recipe and the rest is history....(and not helping my trek to swimsuit season).

The possibilities of what you can do with Dulce de Leche are endless. My favorites are pouring it over vanilla ice cream or using it as a dip for pretzels, fruit, marshmallows, etc.

Oh, and did I mention that it is quite possibly the easiest dessert to make? It just takes a little patience.


Ingredients:

Two 14-ounce cans sweetened condensed milk (like Eagle Brand)
1 teaspoon pure vanilla extract
1 tablespoons light rum
Pinch kosher salt


Directions:

1. Peel off the labels from the cans of sweetened condensed milk and open them, leaving the top resting on the milk.


2. Wrap heavy foil over the top of each can, pushing down on the center of the foil and running fingers around the inner and outer rim of the can, so the can is sealed as tightly as possible.


3. Place the cans in a three-quart sauce pan and fill the pan with hot tap water, leaving 1/2 inch of can above the waterline. Cover the sauce pan with a lid. Over high heat bring the water to a boil, reduce the heat to medium, and simmer for 3 hours. A little milk may spill into the water; don’t worry. What’s important is to maintain the water level by replacing it with hot tap water.


4. After 3 hours, the dulce de leche will look like a deep golden brown pudding thick enough for a fork to stand up in on its own. Carefully remove the cans from the pot.


5. When cool enough to handle, but still pretty warm, pour the dulce de leche into the bowl.


Add the vanilla, rum, and salt and stir until smooth.


6. Cool to room temperature. Cover with plastic wrap and refrigerate for at least 2 hours before using. (It re-thickens as it chills.) Keeps for 2 weeks.

7. Serve over ice cream...

as a dip...
with fruit...
or just eat it with a spoon!

Whatever you do...just don't look at the calories.

Friday, February 18, 2011

Chocolate Covered Cherry Ice Cream

Because....

  • It's gorgeous outside (at least here in Texas)

  • And it's one of my FAVORITE days of the year (Opening Day of Aggie Baseball)

  • And it's Friday (which just makes everything better)
I'm going to share with you all one of my all-time favorite treats my momma makes:


CHOCOLATE COVERED CHERRY ICE CREAM!


Every year, for as long as I can remember, my mom has given me 1 of 2 (or both) things for Valentine's Day:

Chocolate Covered Cherries OR Tagalong Girl Scout Cookies.

This year she bought my a box of chocolate covered cherries, which inspired my idea to turn them into Chocolate Covered Cherry Ice Cream for The Hubs & I for Valentine's Day. (Sadly, I left the cherries at my sister's house and had to go buy another box at HEB).

Ingredients:

* 1 cup heavy cream
* 2 eggs
* 1/2 cup minus 1 Tbsp. sugar
* 1/2 Tbsp vanilla extract
* 1 tsp almond extract
* 1/2 & 1/2
* milk
* 1 box Queen Anne's chocolate covered cherries (10 cherries total)


Directions:

1. Chop up the chocolate covered cherries into little pieces (trying not to eat any as you go).


2. In a bowl, whisk together the eggs & sugar until they are a lemony color. Add the cream, vanilla extract, almond extract and (depending on your ice cream maker - see below) the cherries.


3. Prepare ice cream according to your ice cream makers direction, using 1/2 & 1/2 and milk to fill to the "Fill Line".


4. Transfer ice cream to a air tight container & put in the freezer to "cure" (aka firm up).

5. Enjoy!

My Tid-Bits:

* If your ice cream maker is the type where you can put the paddle in BEFORE adding the ice cream mixture, then go ahead and put your chopped up cherries in the bowl with the rest of the ingredients.

* If you ice cream maker is the type where you put the paddle in AFTER you add the ice cream mixture, don't put your chopped up cherries in the mixing bowl with the rest of the ingredients. Rather, dump the cherries directly into the ice cream maker AFTER you've put the paddle in place. Otherwise, the spot where your paddle should fit will be filled with chocolate covered cherries.

* My mom recommends mixing up the ingredients and letting them sit in the refrigerator for 3 or so hours before you make the ice cream. It helps to meld the flavor together.

* If your ice cream maker is like mine, your ice cream will still be on the thin side after the suggest amount of freezing time. Putting it in an airtight container and putting it in the freezer to cure for a bit will help firm it up before you serve.

* And "Note To Self"...if you're planning to make ice cream, it helps to put the ice cream freezer bowl in the freezer BEFORE you're ready to make it. I totally forgot and we ended up not getting to eat our treat until the next day. Oops!!

* And lastly, if I could be anywhere today, it would be here...


Olsen Field - Home of Aggie Baseball

If you were looking for me from Feb - May during any of my college years, there's a pretty good chance you would have found me here. I LOVE AGGIE BASEBALL. (Don't tell The Hubs I said this, but I'd much rather go to an Aggie baseball game than a football game any day). My college roommates & I even had a count down to Opening Day calendar on our wall every year. There's just something about the 'clink' of the aluminum bat, the LOUD student section & trying to guess the number of engines on the train before it passes by the ballpark that makes Olsen Field one of my favorite places on earth. I can't wait to catch a game in Aggieland this year. Maybe we'll even make it to Omaha...