Thursday, October 7, 2010

Honey Marinated Pork Chops (or Chicken)

The Hubs loves pork chops. Me? Not so much. It's a texture thing. So I don't make them very often. And by not often, I mean never. (I also don't make two of his other favorites - meatloaf & fried chicken. If he wants them that badly, he can go visit his mother).

However, the October issue to Martha Stewart Everyday Food, featured a recipe for a honey marinade that sounded really good. Only one problem...Martha used the marinade to make grilled pork chops. Now, she did say you could use it on chicken instead, but I decided to be a big girl & try the pork chops. If nothing else, my husband would be happy.

So I tried it...

I ate half of my pork chop...

It was okay...

But next time I'm having chicken.

The marinade, however, was delicious!

Ingredients:

* 2 Tbsp. Dijon mustard
* 1/4 cup honey
* 1/4 cup red wine vinegar
* 1/4 cup extra-virgin olive oil
* ground pepper
* 2 or 3 pork chops (or chicken breasts)


Directions:

1. In a bowl, whisk together all ingredients.


2. Place the pork chops in a Ziploc bag and pour 1/2 of the marinade over them, reserving the other half for another use (see below).


3. Refrigerate for at least one hour (up to 3 hours) before grilling, baking or pan frying. (We grilled ours).


My Tid-Bits:

* The marinade can be used for other things as well. Martha suggests: Adding it to shredded cabbage to make a sweet-and-sour slaw; Tossing it with steamed cauliflower or broccoli; Marinating firm tofu and baking or grilling (I guess that would be good, if you like that kind of thing); OR using it as a salad dressing. That's what I did and it was tasty!


* The Hubs actually used some of the left over marinade as a sauce & poured it on his pork chop.

* If you do grill the pork chops, be sure not to over cook them. They dry out & get tough very easily. (Although, next time I'm sticking with chicken).

* When I made my grocery list, I forgot to check & see if I already had Red Wine Vinegar in the pantry, so I just grabbed a bottle at the store. Apparently that's not the first time I've done that....

Oops!!

.

Saturday, October 2, 2010

Buffalo Wings


In case you didn't know, college football (especially Aggie football) is kind of a big deal in our home. So, when the Ags played OSU on ESPN Thursday night, we thought it was a great excuse to have friends over. While we won't discuss the outcome of the game (it still hurts too much), we did have a good time visiting with friends while munching on some football food.

I don't know if there's a better football watching food than Buffalo Wings. The two just go together. (Although, I must confess that I hadn't EVER ordered Buffalo Wings until about a month ago. Now I'm hooked). However, the wings you get at most restaurants are fried & full of calories & fat. So, I set out to find a good recipe for baked Buffalo Wings and I hit the jackpot! Alton Brown (from the Food Network) had a recipe that had received over 200 reviews with an average rating of 5 stars. And the reviews were right! YUMMY!!

Below is the original recipe:

Ingredients

  • 12 whole chicken wings
  • 3 ounces unsalted butter
  • 1 small clove garlic, minced
  • 1/4 cup hot sauce (I used Frank's Red Hot)
  • 1/2 teaspoon kosher salt

Directions

1. Place a 6-quart saucepan with a steamer basket and 1-inch of water in the bottom, over high heat, cover and bring to a boil.

2. Remove the tips of the wings and discard or save for making stock. Using kitchen shears, or a knife, separate the wings at the joint. *(see below)

3. Place the wings into the steamer basket, cover, reduce the heat to medium and steam for 10 minutes.

4. Remove the wings from the basket and carefully pat dry.

5. Lay the wings out on a cooling rack set in a half sheet pan lined with paper towels and place in the refrigerator for 1 hour.

6. Preheat the oven to 425 degrees F.

7. Replace the paper towels with parchment paper.

8. Roast on the middle rack of the oven for 20 minutes. Turn the wings over and cook another 20 minutes or until meat is cooked through and the skin is golden brown.

9. While the chicken is roasting, melt the butter in a small bowl along with the garlic. Pour this along with hot sauce and salt into a bowl large enough to hold all of the chicken and stir to combine.

10. Remove the wings from the oven and transfer to the bowl and toss with the sauce.

11. Serve warm.

12. Don't forget the Ranch Dressing (or Blue Cheese, if you're into eating mold).


My Tid-Bits:

* I took the easy road & just bought wing portions & drumettes at HEB. That eliminated step 2 above.

* I knew that 24 wings portions wasn't going to feed 5 people. So I bought about 48 pieces and doubled the sauce. I also had to steam the wings in 2 batches.

* When I first read the recipe, I thought to myself, "why on earth do you steam the wings first." But all the reviews said not to skip this step, so I didn't. I'm still not exactly sure why you do this, but I'm pretty sure it has to go with making the meat super tender & the skin extra crispy. Don't ask questions....just steam the wings.

* I was AMAZED by the amount of fat that dripped off during the steaming & roasting process. I could just see the extra calories & fat melting away!!

* For the sauce, I used Frank's Red Hot Original (not the Buffalo) and it was perfect! They weren't super spicy, but still had great flavor.

* I couldn't resist making more Pumpkin Ale Bread this week. I served it, along with this yummy Caramel Apple Dip, for dessert. Someone came up with the idea of putting the dip on the bread. I wish they hadn't. It's dangerously tasty.

Wednesday, September 29, 2010

Chicken Noodle Soup (The Neelys Recipe)


HOORAY! Cooler weather has finally arrived in Houston. (Now the question is, will it stay?) Yesterday, we opened up the windows and enjoyed the beautiful weather.

And in honor of the arrival of Fall weather, I decided to make...you guessed it....SOUP! Chicken Noodle to be exact.

I searched my magazines & the internet and finally settled on making The Neely's Chicken Noodle Soup. The reviews all raved about how wonderful it was, so I thought I'd give it a try.

Here's their recipe:

Ingredients:
  • 2 tablespoons butter
  • 1 tablespoon olive oil
  • 1 large Vidalia onion, chopped
  • 2 celery stalks, halved lengthwise and cut into 3/4-inch pieces
  • 2 medium carrots, halved lengthwise and cut into 3/4-inch pieces
  • Salt and freshly ground black pepper
  • 2 cloves garlic, chopped
  • 3 tablespoons all-purpose flour
  • 6 cups chicken stock
  • 1 bay leaf
  • Dash hot sauce (recommended: Tabasco)
  • Dash Worcestershire sauce
  • 2 boneless, skinless chicken breasts, cubed into bite-size pieces
  • 4 ounce egg noodles, about 1 cup
  • 8 ounces frozen peas
  • 1/4 cup freshly chopped dill leaves


Directions:

1. Melt the butter in a large Dutch oven over medium heat and add the olive oil. Add the onion, celery and carrots and saute until soft, about 4 minutes. Season with salt and pepper, to taste.

2. Stir in the chopped garlic and saute until fragrant, 1 minute more.

3. Whisk in the flour and stir frequently until it coats the vegetables and makes a paste.

Cook until it reaches a pale blonde color, about 2 minutes.

4. Gradually whisk in the chicken stock, making sure there are no lumps. Add the bay leaf, hot sauce, and Worcestershire and season with salt and pepper, to taste. Let the soup simmer for 15 minutes to thicken and develop the flavors.

5. Reduce the heat and add the chicken and the noodles. Do not boil the chicken or it will become tough.

6. Add the peas and the dill...

And simmer gently for 10 more minutes.

7. Taste for seasoning and add more salt and pepper, if needed. Ladle the soup into serving bowls and serve.


My Tid-Bits:

* I made very few changes to the original recipe. I only added 1 extra stalk of celery and 1/2 cup more of egg noodles (because many of the reviews said it needed more).

* This soup had a lot of flavor and was very filling. The dill was a little over powering (and I really like dill). If I make it again, I will decrease the dill and add some Italian seasoning. I also won't use the peas, simply because I don't really care for peas in the first place.

* DO NOT cook the chicken before you toss it in the pot. The hot broth will do the cooking. And the Neelys were right...not boiling the chicken makes it very tender!

Monday, September 27, 2010

Monday Morsel from Mom (8th Edition) - Peppered Shrimp

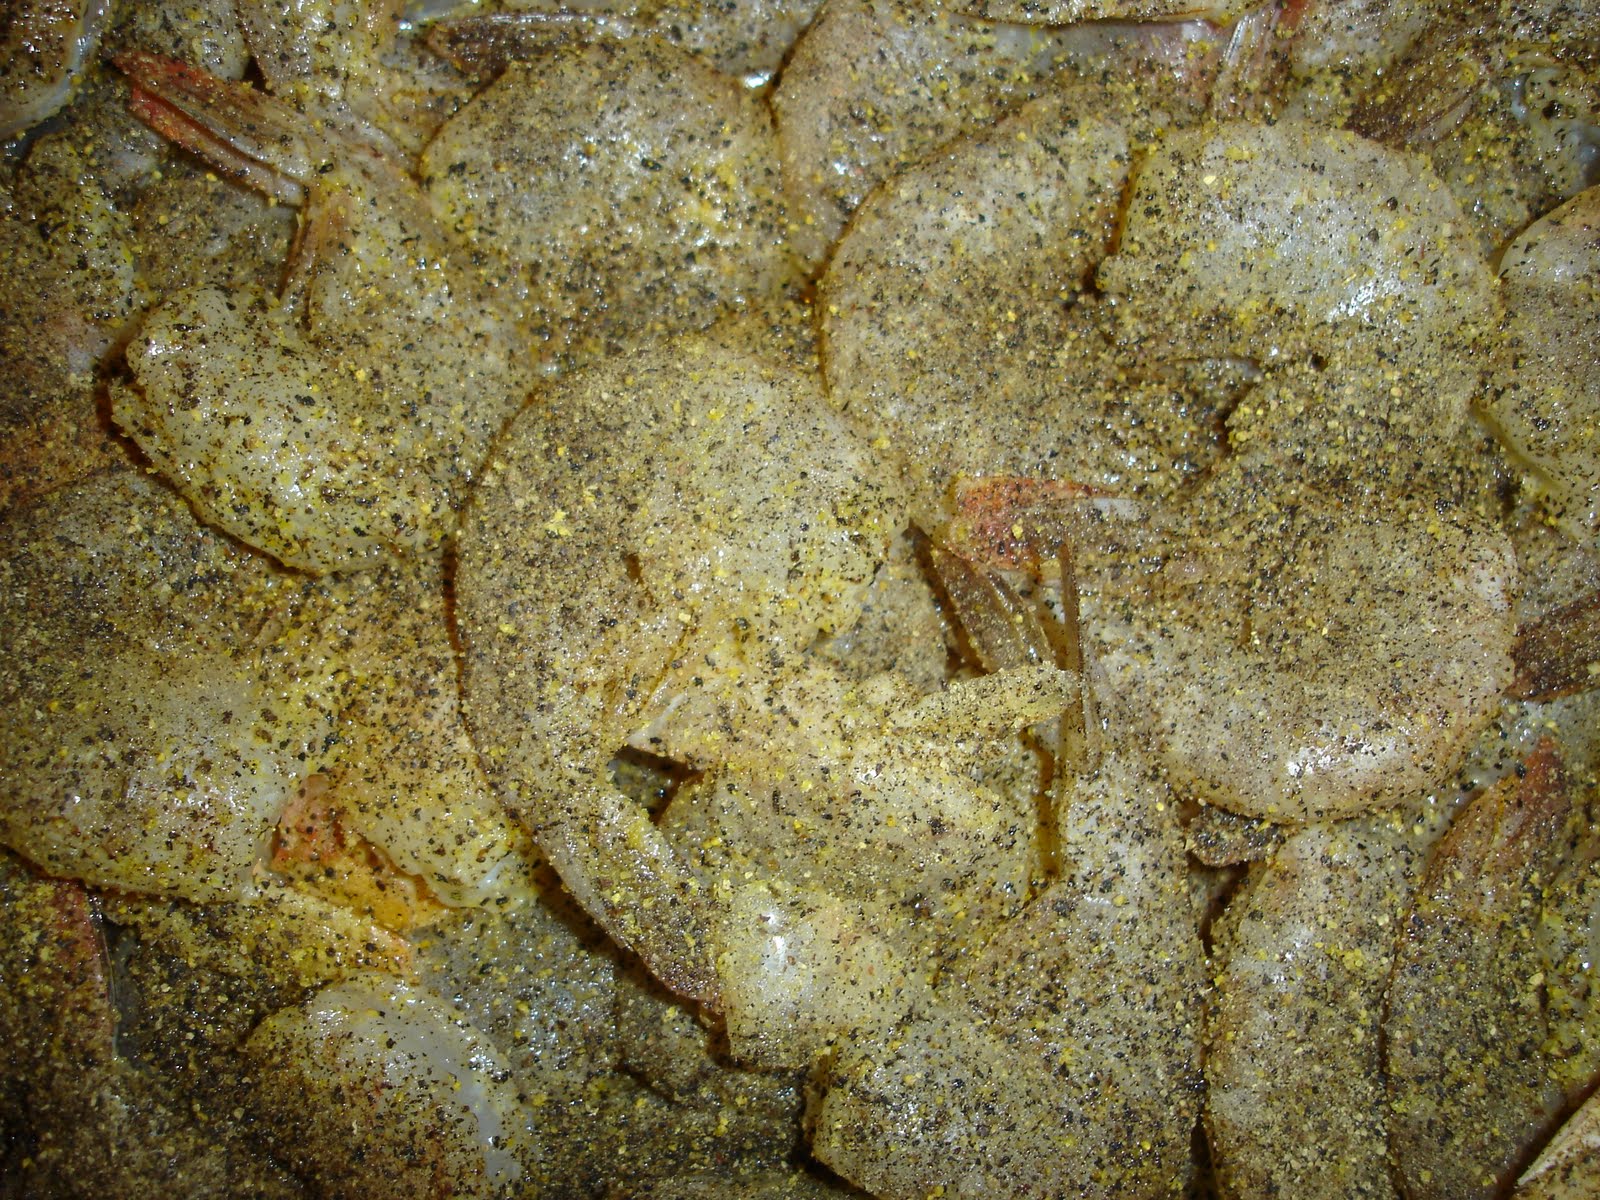
Two of our six nephews joined us at the lake house this weekend. (Yes, we have 6 nephews and 0 nieces. We're surrounded by little boys). They both LOVE shrimp, especially the 16-year-old, so I decided to make them a treat: my mom's Peppered Shrimp. It is buttery, peppery, shrimpy goodness. It's also probably one of the easiest recipes on earth.

(I apologize in advance for the poor pictorial documentation. We didn't get to the lake until late Friday evening & I was in a hurry to get dinner on the table).

Ingredients:

* 1 stick butter
* 2 lbs medium or large shrimp, shell on
* lemon pepper
* garlic salt
* black pepper
* French bread

Directions:

1. Preheat oven to 325 degrees. Cut butter into cubes & place in a 13"x9" baking dish. Place the dish in oven until butter is melted.

2. Pour shrimp into the dish with the melted butter & toss to coat.

3. Sprinkle shrimp very generously with lemon pepper & garlic salt. Then COVER shrimp in black pepper.


I mean COMPLETELY cover them in pepper. You can't use too much.


4. Bake shrimp for 25 to 30 minutes, stirring every 10 minutes, until shrimp are cooked through.


5. To serve, spoon shrimp onto a plate and top with butter sauce.

6. And now for the best part: Use the French bread to sop up the buttery, peppery goodness left on your plate & in the bottom of the dish.

My Tid-Bits:

* The Hubs absolutely loves this dish. However, for obvious reasons (see #6 above), I don't make it very often. Our hearts might stop prematurely.

* While this dish does use a lot of pepper, it is surprisingly not spicy.

* Be sure to have roll of paper towels on the table. Peeling the shrimp can get messy.

Enjoy!!

Sunday, September 26, 2010

Pumpkin Ale Bread

I've already mentioned a time or two (or ten) how much I love Fall and all that it entails.....pumpkins, apples, football, cooler weather, cute sweaters, etc. Want to know why else I love fall?? Fall beers. It may sound a bit odd, but I love Octoberfest beers & Pumpkin Ales. My personal faves are Saint Arnolds & Sam Adams, but they're all good.

I recently read a blog post about a baker in Boston who used Sam Adams Harvest Pumpkin Ale to make a delicious pumpkin bread. I instantly knew I had to make it and OH MY HEAVENS am I glad I did!!

If you don't try any other recipes that I share, you should try this one. DELICIOUS!!

Samuel Adams Harvest Pumpkin Ale Bread

Bread Ingredients:
* 1 1/2 cups granulated sugar
* 1/2 cup canola oil (or vegetable oil)
* 2 large eggs
* 1 cup Harvests Pumpkin Ale puree (see below)
* 1 3/4 cups all-purpose flour
* 1 tsp salt
* 1 tsp baking soda
* 1/2 tsp baking power
* 1 Tbsp pumpkin pie spice
* Powdered sugar (for dusting, optional)

Pumpkin Ale Puree Ingredients:
* 1-15-oz. can pumpkin puree
* 2/3 granulated sugar
* 1 bottle Samuel Adams Harvest Pumpkin Ale (or any Pumpkin Ale)
* 1 tsp pumpkin pie spice

Directions:

1. Preheat over to 350°.

2. In a bowl, combine all ingredients for Pumpkin Ale Puree.

Mix well & set aside.

3. Combine the sugar and oil in a mixing bowl using an electric mixer with paddle attachment at medium speed.

Slowly add the egg.


4. Stop the mixer and add 1 cup of Pumpkin Ale puree. NOTE: Only add 1 cup of the puree, NOT all of it. Turn mixer to low-medium speed and leave it running for 4-5 minutes.

5. In a separate bowl, combine all the dry ingredients.


6. Stop the mixer and add the dry ingredients. Mix for 1 minute at low speed or until all the ingredients are mixed together.

7. Grease a 9- by 5-inch loaf pan. You can either use butter & flour or the wonderfully magic Baker's Joy spray.


8. Pour the mixture into the pan, leaving room at top of pan for bread to rise.


9. Bake for 60 minutes. Check bread by sticking the center with a knife (when knife comes out clean, remove from oven). If needed, bake for another five to eight minutes or until knife comes out clean. Let cool in pan for 10 - 15 minutes and then turn out onto a wire rack to cool completely.


10. Once the bread has fully cooled, finish with light dusting of powdered sugar, if desired.


My Tid-Bits:

* I've made plenty of pumpkin bread recipes over the years, but this one was truly exceptional. The Pumpkin Ale just gives it a bit of a different flavor that is just yummy!

* I took the bread with us to the lake house this weekend. I sliced into it after dinner & 30 minutes later, it looked like this:

Everyone could not get enough. It was SO GOOD! You must try it!

* This Pumpkin Ale Bread would be great to give as a gift or serve at a brunch or Thanksgiving dinner.

* The original recipe uses Sam Adams Harvest Pumpkin Ale, but my grocery didn't have it, so I subbed in a different Pumpkin Ale. This time of year, you should be able to find at least one brand at any liquor store. World Market carries Buffalo Bill's Pumpkin Ale, which is exceptionally good! (Just ask The Hubs. I bought a bottle specifically for this recipe & he accidentally drank it. Oops! I was able to find a different kind at Spec's).

* This recipe also calls for canola oil, but I was all out, so I used vegetable oil instead & it turned out fin.

* The recipe for the Pumpkin Ale Puree makes about 3.5 cups, but the bread recipe only calls for 1 cup of puree. I didn't know what to do with the other 2.5 cups, so I threw it away. Now I know better. Next time I'll just make more bread!

* Isn't my pumpkin loaf pan cute? My friend Jenn gave it to me as a "Thank You" gift last year. It's from Williams-Sonoma and they still have them here.


HAPPY FALL!

.

Friday, September 24, 2010

Shrimp & Roasted Veggie Couscous

Earlier this week, The Hubs requested shrimp for dinner. And I've been on a kick of roasted veggies lately. So, I combined the two and served them over couscous. It made a delicious, fast, easy & healthy meal.

Ingredients:

* 24 (ish) medium to large shrimp
* 1 medium zucchini, sliced
* 1 red bell pepper, chopped into large pieces
* 3 cloves of garlic, crushed
* 1/2 an onion, chopped into large pieces
* juice & zest of 1 lemon
* 2 Tbsp extra virgin olive oil
* 2 tsp. Italian seasoning
* 1/4 cup chopped basil
* 1 cup cooked couscous
* salt & pepper

Directions:

1. Preheat the oven to 400 degrees.

2. In a bowl, toss veggies with 1 Tbsp. EVOO, 1 clove garlic and 2 tsp. Italian seasoning. Transfer to a baking dish & cook for 15 minutes or until desired tenderness.


3. Meanwhile, prepare couscous according to directions on the package. (You will need one cup cooked).

4. Once you get the couscous going, heat 1 Tbsp. evoo in a saute pan with 2 cloves of garlic. Add shrimp & juice from 1/2 a lemon. Saute for 3 - 4 minutes until cooked through.


5. When veggies are done, place couscous in the bottom of a serving dish. Stir in juice from the other 1/2 of the lemon and a little lemon zest. Top with veggies, shrimp & chopped basil. Season with salt & pepper.

My Tid-Bits:

* Makes 2 servings, each with approximately 400 calories.

* I am in love with the McCormick's Italian Seasoning Grinder. You should get one! I've been using it to season all kinds of veggies & meats. The flavor is amazing!

* Want to know what else is amazing? The smell of the pumpkin bread I just pulled out of the oven. It's taking all my will power not to walk back into the kitchen & slice into it right now. Don't worry...I'll be sharing the recipe VERY soon.

Sunday, September 19, 2010

Apple Praline Bread


I'm always on the hunt for new recipes involving pumpkins & apples. I LOVE using apples & pumpkin in the fall. It just feels right.

Last year, I found this recipe for Apple Praline Bread in Southern Living and HAD to make it. OH MY HEAVENS! It is dangerously tasty.

Photo: SouthernLiving.com

I couldn't wait to make it again this year, but it had to be for some occasion or else The Hubs & I would eat the entire loaf all by ourselves. Well this weekend I had just the occasion! My bestie & our moms were coming to my house for a little mother/daughter weekend while our husbands were away on a "man trip." I served the Apple Praline Bread along with some things we picked up at the local Farmer's Market for brunch this morning.


Ingredients:

* 1 1/2 cups chopped pecans, divided
* 1 (8-oz.) container light sour cream
* 1 cup granulated sugar
* 2 large eggs
* 1 tablespoon vanilla extract
* 2 cups all-purpose flour
* 2 teaspoons baking powder
* 1/2 teaspoon baking soda
* 1/2 teaspoon salt
* 1 tsp cinnamon
* 1 1/2 cups finely chopped, peeled Granny Smith apples (about 3/4 lb.)
* 1/2 cup butter
* 1/2 cup firmly packed light brown sugar


Directions:

1. Preheat oven to 350°. Bake 1/2 cup pecans in a single layer in a shallow pan 6 to 8 minutes or until toasted and fragrant, stirring after 4 minutes.

2. Beat sour cream and next 3 ingredients at low speed with an electric mixer 2 minutes or until blended.

3. Stir together flour and next 4 ingredients. Add to sour cream mixture, beating just until blended. Stir in apples and 1/2 cup toasted pecans. Spoon batter into a greased and floured 9- x 5-inch loaf pan. Sprinkle with remaining 1 cup chopped pecans; lightly press pecans into batter.

4. Bake at 350° for 1 hour to 1 hour and 5 minutes or until a wooden pick inserted into center comes out clean, shielding with aluminum foil after 50 minutes to prevent excessive browning. Cool in pan on a wire rack 10 minutes; remove from pan to wire rack.

5. Bring butter and brown sugar to a boil in a 1-qt. heavy saucepan over medium heat, stirring constantly; boil 1 minute. Remove from heat, and spoon over top of bread; let cool completely (about 1 hour).


My Tid-Bits:

* To keep from making a huge mess, be sure to place a piece of foil under the wire rack before you start pouring on the praline sauce.

* Also, I only used about 1/2 of the praline sauce. It was plenty.

* See those pancakes in the brunch picture. They're delicious! I'll share the recipes for those sometime soon.